Today is Fabulous Friday! It is a little rainy in Northern Illinois, but I love the rain!
If you have not joined the Let It Snow Stamping Facebook Group, make sure you do so today! Fridays are a big thing in the Group! Tonight we will be holding a Virtual Open Craft Night. You will also find the Fabulous Friday sketches when they are not posted to the blog.
Here is today’s sketch

The wonderful thing about sketches is that they provide base layout inspiration. There are some days I really need sketches to help me get that card idea out of my brain and into reality.
I modified today’s sketch a bit by turning it on it’s side.
I started out with a Mossy Meadow card base measuring 8-1/2″x5-1/24, scored at 4-1/4″.
The card front, measuring 4″x5-1/4″, is cut from a piece of the beautiful World of Good Specialty Designer Series Paper pack that will be retiring soon. The price has been dropped from $15 to $9!

Next, I cut a strip of Mossy Meadow (5-1/4″x2-1/2″) and a strip of Basic White (5-1/4″x1″) and glued them together, centering the white in the middle of the Mossy Meadow.
Because I wanted a darker sentiment, but not too dark, I used my Stamparatus to stamp the sentiment. I used Smoky Slate ink and stamped it twice to give it the right tone. With the Stamparatus, you can stamp an image several times with perfect placement each time.
Then, I glued the strips to my card front, centering it.
On a scrap of Basic White, I stamped my Pampered Pets image and cut it out with the matching Pets Dies. I colored him in using Smoky Slate Stampin’ Blends and used the Mossy Meadow Stampin’ Blends for his collar.

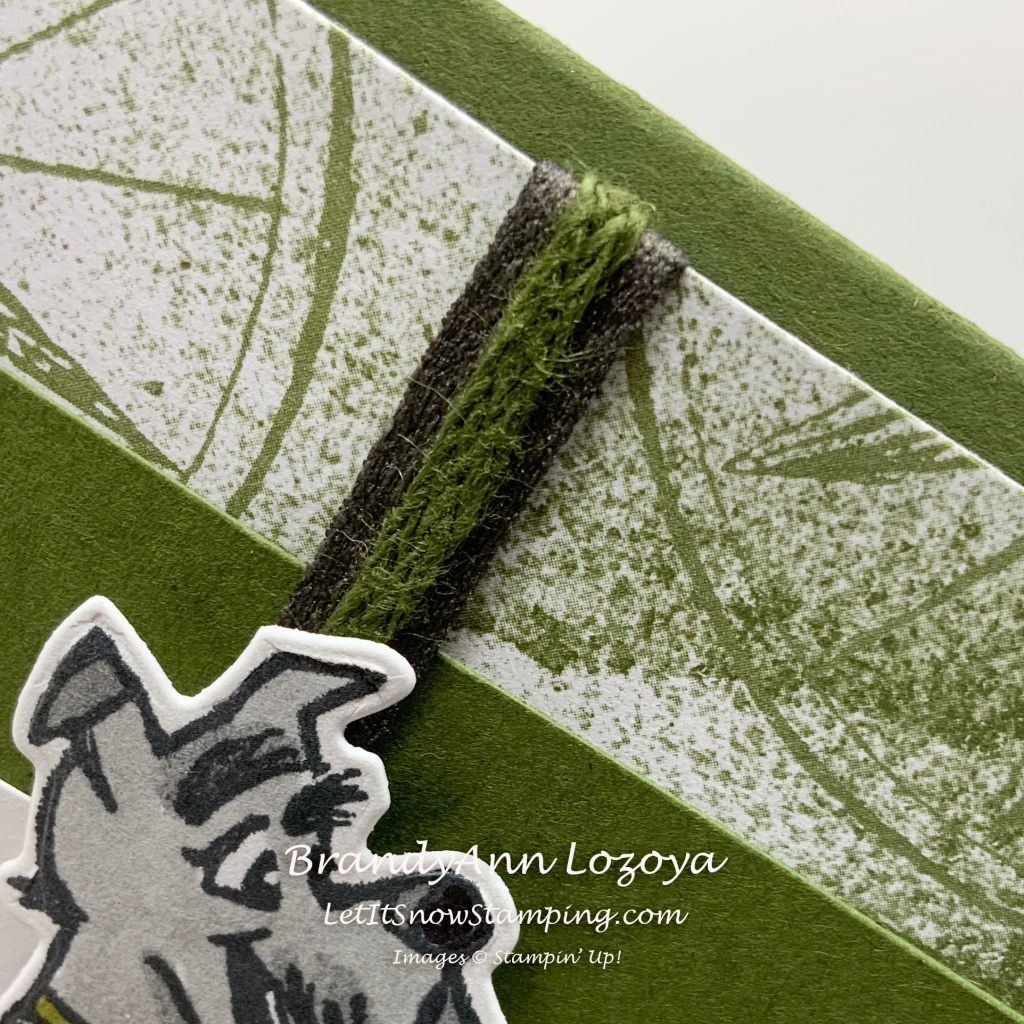
Before gluing the card front to the card base, I wrapped two pieces of ribbon to the card front and secured it to the back with Scotch tape. Here I used the Early Espresso Faux Suede Trim and the Mossy Meadow Braided Linen Trim. I used about 6″ of each. Because I am not talented, I taped each ribbon down separately!
Once I secured the ribbon to the card front, I added the dog image using Stampin’ Dimensionals. I wanted to make sure he did not bend from the height of the ribbons.
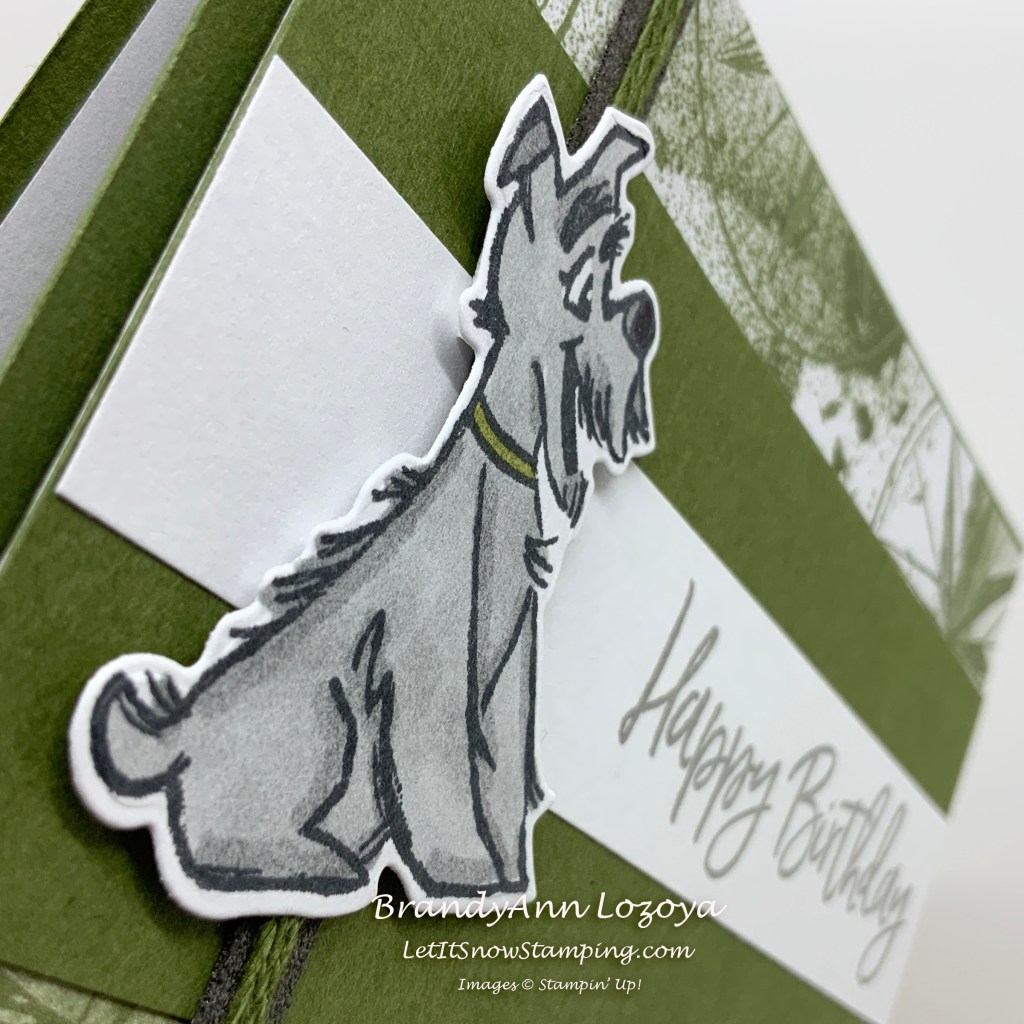
To finish off the card, I used Stampin’ Dimensionals to secure the card front to the card base. You can see the lifted layers on the photo below.

I hope you enjoyed today’s project. Make sure to subscribe to Let It Snow Stamping so you never miss another blog post. Every week I pick a stamp set and make one project (possibly two) every weekday. As an added bonus I also make videos for new techniques. The techniques can also be found under the Technique Corner tab.
Make sure you find LISS on:
Facebook (#LISStamping, @LetItSnowStamping),
Instagram (@LetItSnowStamping),
