Happy Stampin’ Friday!
Are you ready for some weekend crafting? I sure am! This weekend I plan to do some gel press printing. I started a bit last night, but I had to clean up to make today’s card project. This weekend it will be all about the prints I can create for my mixed media journal. I will be watching a lot of videos as I am still a beginner. I have a ton of prints already, but not quite sure how to use them. Something tells me this is going to be similar to collecting 12×12 pattern paper! At least with that I have found a way to use them without crying by doing One Sheet Wonder card sets! Now to figure out what to do with my gel prints!
For today’s project I used a challenging color scheme for me. I do not like yellows and oranges for the most part, but today I challenged myself to use them because other people DO like those colors. The layout was inspired by a card I saw on Facebook, and wouldn’t you know it, I can’t find it now!! In any case, I would love to thank the person who posted this design layout in one of my many card making groups, even though I do not know who you are!
Project:

Supplies:
- Calypso Coral card base measuring 8-1/2″x5-1/2″, scored and folded at 4-1/4″
- Pattern Party Designer Series Paper cut to 4-3/4″x3-1/2″
- Pumpkin Pie cardstock measuring 3-1/2″x2″
- Basic White cardstock, 1 piece measuring 5-1/4″x4″ (inside panel), 1 piece measuring 3″x1-1/2″, and a scrap piece to punch out daisies
- Granny Apple Green scrap to punch out leaves
- Crumb Cake scrap to cut out daisy centers
- Tuxedo Black, Calypso Coral, Pumpkin Pie, Pale Papaya, Coastal Cabana, and Soft Suede ink pads
- Retired Forever Greenery Gold Trim (Can use current Simply Elegant Trim #155766)
- Wink of Stella pen
- Tasteful Textile 3D Embossing Folder
- Painted Texture 3D Embossing Folder
- Daisy Punch
- Medium Daisy Punch
- Penned Flowers Dies
- Water Painter
- Blender Pen
- Daubers
- Mini Stampin’ Dimensionals
- Liquid Adhesive
- Glue Dots
- Clear Epoxy Raindrops (Though I did not mention the step for these, if you are the first person to spot at least one and add a comment below, I will mail you this card! Just tell me where you spotted it!)
To purchase the supplies for this project, click on the Shop Now button at the end of this post!
Instructions:
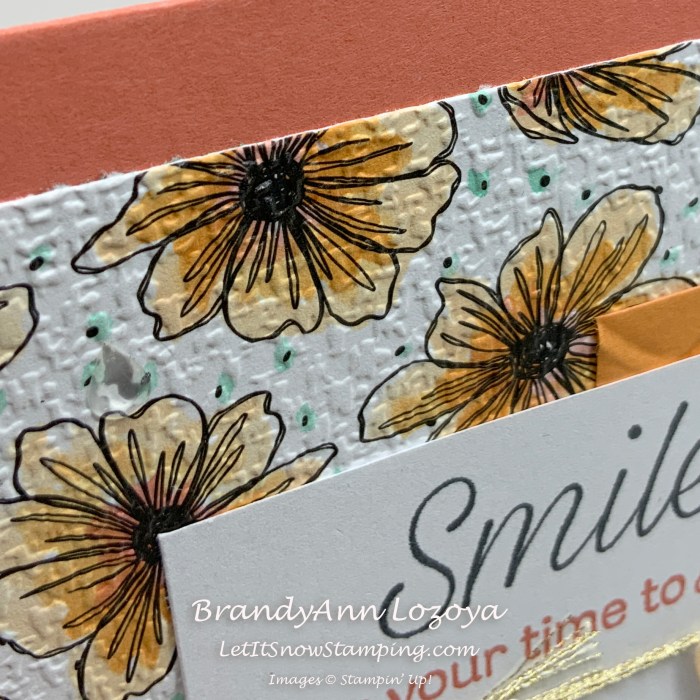
I had a scrap of Designer Series Paper (DSP) that I wanted to try to color in. I am not great at coloring, but this was pretty easy.

Using a Water Painter add Calypso Coral to the middle of each blossom. Then follow the lines in the petals with Pumpkin Pie and finished off the edges of the petals with Pale Papaya.


To add a splash of color I highlighted the dots using Coastal Cabana.

Once it is completely dry, run it through the embossing machine using the Tasteful Textile 3D Embossing Folder.

While you are at your machine, emboss the Pumpkin Pie piece using the Painted Texture 3D Embossing Folder.

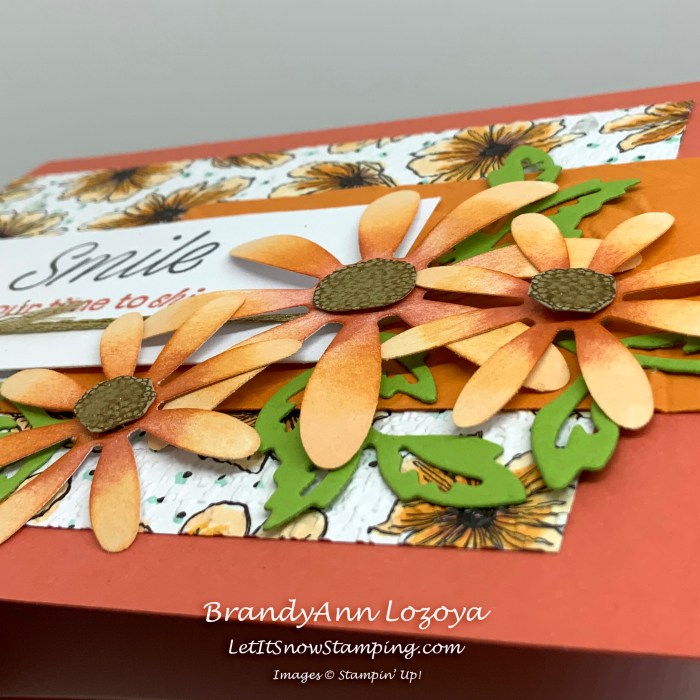
Punch out two medium daisies and one large daisy using the Daisy Punches and color them in the same pattern using a Sponge Dauber. Calypso Coral in the center, Pumpkin Pie in the middle, and Pale Papaya at the tips of the blossom.


Next, give the petals some texture by running a bone folder under each petal pulling out and down.

Add Mini Stampin’ Dimensionals to the backs of each daisy.

On the small piece of Basic White, stamp your sentiment using Tuxedo Black and Calypso Coral. Add gold cord.

Here is how I taped the cord down in the back. Hopefully you can see the tape.

Adhere all of the elements to the card front as shown below. Sorry, I forgot to take pictures of each step.
First glue down the DSP, vertically centered and flush to the left side of the card base.
Next glue down the Pumpkin Pie textured piece, vertically centered and flush to the right side.
The sentiment piece should be offset to the left as shown, so the daisies fit on the right side.

Next, add the leaves cut from the Penned Flowers Dies set and glue them in using Liquid Glue. Make sure to tuck them in behind the daisies.

Cut a 4″ length of cord to make a cheater bow. Tuck the length of cord under the existing cord and tie a simple knot. I secured my knot with a bit of liquid glue. It dries clear.


On the scrap of Crumb Cake, stamp two medium daisies and one large daisy. They do not need to be whole as we only want the centers.

Using a Blender Pen, color in the centers. Fussy cut each daisy center out and glue to the daisies using Glue Dots.

Add a bit of sparkle using the Wink of Stella Pen.

More Photos:


I hope you enjoyed today’s project. Make sure to subscribe to Let It Snow Stamping so you never miss another blog post. Every week I pick a stamp set and make one project (possibly two) every weekday. As an added bonus I also make videos for new techniques. The techniques can also be found under the Technique Corner tab.
Make sure you find LISS on:
Facebook (#LISStamping, @LetItSnowStamping),
Instagram (@LetItSnowStamping),
