Hello friends!
I wanted to share a card that was inspired by my friend Lori Marcantonio. I was able to make a version of this cute penguin card at her Stamp Camp a couple of weeks ago. I absolutely love penguins and made sure this set from the July-December Mini Catalog was in my last order!
The set is called Penguin Place and if you purchase the bundle, it comes with the Penguin Builder Punch. I love how versatile it is as well. Yes, you can use it for holiday and winter cards, but you can also use it for year-round birthday, thank you, smile, and any other type of card you might need.

Download Jul-Dec 2021 Catalog here
The project:

This card is a fun fold card that opens up like a gate card from both sides. I am sure it has a proper name, but I cannot remember it off the top of my head! Anyway…
Supply List:
- Penguin Place Bundle
- Basic Black Cardstock – Card base 8-3/4″x4-1/4″, scored at 3-1/4″, mat piece 3″x2-1/4″, hinge piece 2-1/4″x1-1/4″, scored at 1/2″
- Basic White Cardstock – Inside mat 5-1/4″x4″, focal piece 2-3/4″x2″, scrap for penguin stamp
- Calypso Coral scrap for flipper feet
- Designer Series Paper (DSP) of choice – 3″x4″
- Classic Stampin’ Pads in Calypso Coral, Just Jade, Bumblebee, Pool Party
- Momento Tuxedo Black stamp pad
- Matching Ribbon of choice
- Stampin’ Dimensionals
- Rhinestone Basic Jewels
- Brick and Mortar 3D Embossing Folder
Click on the SHOP NOW button below to purchase supplies
Instructions:
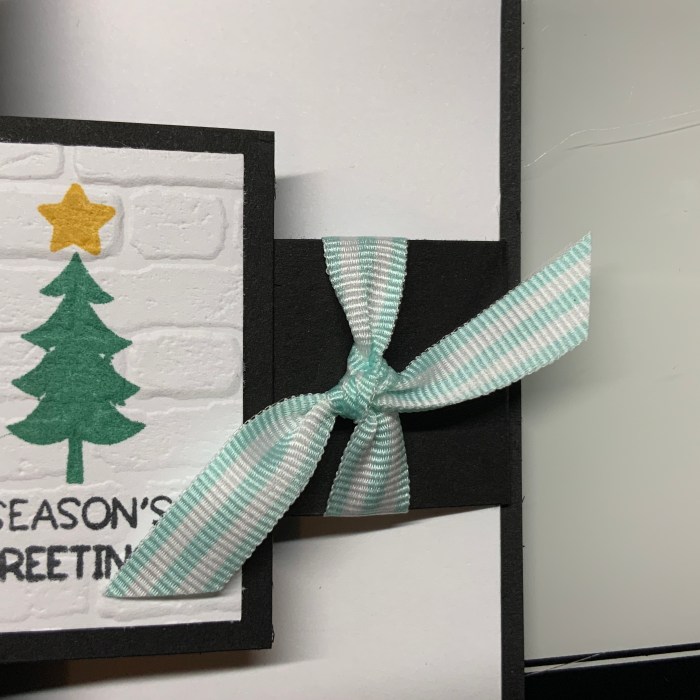
We will start with a piece of Basic White cardstock measuring 2-3/4″x2″. Stamp the tree in Just Jade and the star in Bumblebee, followed by stamping the greeting in Tuxedo Black. Next, I ran it through my Stampin’ Cut & Emboss Machine using the Brick and Mortar 3D Embossing Folder.

Card base: I cut my cardstock in half to measure 8-1/2″x5-1/2″. Then, I cut one piece down to 8-3/4″x4-1/4″ for the card base. This left me with the scrap to cut out the next two pieces.
Next, I mounted the piece on Basic Black cardstock measuring 3″x2-1/4″. After cutting this piece, you should be left with a smaller piece for the hinge.

The next piece we will work on is the right side hinge. Begin by cutting a 2-1/4″x1-1/4″ piece of Basic Black cardstock and score it at 1/2″. Next, fold at the score line.


Next, on a piece of Basic White measuring 5-1/4″x4″, stamp the inside sentiment using Just Jade. Make sure to keep it on the left side of the card so it does not show out the front of the card.

Flip the Basic White over vertically and glue the hinge to the right side. The hinge should be on the opposite side of the inside sentiment.


Next, score the card base at 3-1/4″ and fold. Mount the inside sentiment piece to the card base.

Now, fold both gates to the middle and add adhesive to the hinge.

Center the tree piece before pressing down on the adhesive.

Cut a piece of DSP measuring 3″x4″ and glue it to the left side front panel of the card.

On a scrap of Basic White stamp the front facing penguin using Tuxedo Black. Use Calypso Coral for his beak. Punch out penguin using the Penguin Builder Punch. Then, stamp the gift separately in Pool Party and fussy cut it out. Punch out two flipper feet from a scrap of Calypso Coral cardstock.
Glue the gift and the flipper feet to the penguin.

Add two Stampin’ Dimensionals to the back of the penguin.

Adhere the penguin to the tree piece, like so.

Tie a piece of matching ribbon (I matched it to my Pool Party colored DSP) to the hinge for a bit of decoration.
I also added a little extra bling to the corners. When you add Rhinestone Basic Jewels, or other bling, try to do it in odd numbers (1, 3, 5, etc.)

Here is a look at the finished inside.

I hope you enjoyed today’s project. Make sure to subscribe to Let It Snow Stamping so you never miss another blog post. Every week I pick a stamp set and make one project (possibly two) every weekday. As an added bonus I also make videos for new techniques. The techniques can also be found under the Technique Corner tab.
Make sure you find LISS on:
Facebook (#LISStamping, @LetItSnowStamping),
Instagram (@LetItSnowStamping),
