Happy Monday Stamping Friends! I hope everyone had a wonderful weekend. I know I did! I got to sleep in both days, so that ranks at the top for a great weekend! LOL!
This week’s set is one of my favorites in the new mini catalog! I don’t know about you, but I love ice cream, even in the winter! I would have had some today, but I had some carrot cake to eat before the kids made it disappear. My favorite way to eat ice cream is when I am sitting on the sofa, wrapped in a blanket, with the fire crackling beside me as I watch TV or read a book! I adore a bowl with Vanilla Bean ice cream, hot fudge, and pecans. How about you? What is your favorite ice cream treat?
Share A Milkshake Stamp Set
This stamp set is part of the current Mini Catalog.

Supplies:
- Card Base – Tahitian Tide
- 5-1/2″ x 8-1/2″, scored and folded at 4-1/4″
- Card Front
- Granny Apple Greem
- 5-1/4″ x 4″
- 2022-2024 In Color Designer Series Paper
- 1″ x 3-3/4″ (4)
- Basic White
- 3-1/2″ x 2-1/2″
- 5-1/4″ x 4″ Inside Mat
- Scrap pieces large enough for dies & punch in:
- Basic White
- Crumb Cake
- Cherry Cobbler
- Granny Apple Greem
- Stamp Pads/Markers
- Crumb Cake
- Blushing Bride
- Cherry Cobbler
- Wink of Stella Glitter Pen
- Tools
- Stampin’ Dimensionals (Item #104430)
- Bone Folder (Item #102300)
- Share A Milkshake Dies (Item #160395)
- Double Oval Punch (Item #154242)
Let’s Make this!
Begin by folding the card base in half and burnishing with a bone folder for a crisp fold.


Adhere Granny Apple Green card front to the card base.

Next, add the DSP pieces in a haphazard pattern. I start at both ends and then add the middle.


Now we are going to make the waffle cones using the Share A Milkshake Dies. Using a Blending Brush, add color using Crumb Cake Ink. Then use Bone Folder to curl the edges of the waffle cones and fold at the scoring lines.


You do not need to used the Bone Folder, but look at how much dimension it gives the cone.

Now, using liquid glue, glue your two waffle cone edges together. I used my Bone Folder to help me from pressing too hard and flattening the cone. Set them aside to dry


Stamp ice cream in Blushing Bride. I stamped 4 with the large ice cream stamp and 2 with the smaller ice cream stamp. Then used the coordinating die cut to cut them out.


Add a Dimensional to one side of the large ice cream scoop and adhere to the back of the waffle cone.


Add the small scoop on the right side of the cone to cover the slit on the large cone. I accidentally deleted the photo for this set, sorry!
For the second large scoop, run the Bone Folder along it to bow it a bit, like we did for the waffle cone.


Stamp cherry on Basic White using Cherry Cobbler ink. Now, die cut or fussy cut, then use liquid glue to glue to the front of the bowed scoop. Tuck it into the slit. Add a Dimensional to the scoop and add to the waffle cone.


I had an embossed scrap of Basic White from another project, but I used the Stripes & Splatters 3D EF to emboss it. The I cut it down to the dimensions above.
Adhere the embossed piece to the card front and glue down the waffle cones as shown.


Stamp sentiment using Cherry Cobbler on a scrap of Basic White cardstock. Punch out with the Double Oval punch. Then, punch out the oval mat out of Cherry Cobbler cardstock.


Adhere two layers together, add a few Dimensionals, and adhere to the card front. Originally I was not going to use Dimensionals, but I wanted it to pop a bit and I am very glad I used them!


Next, stamp the sentiment and cherries to the inside mat.


Add a bit of Wink of Stella to the cherries to make the sparkle. Adhere the mat to the inside of the card.


Add Wink of Stella to the cherries on the card front too!

Up close & personal
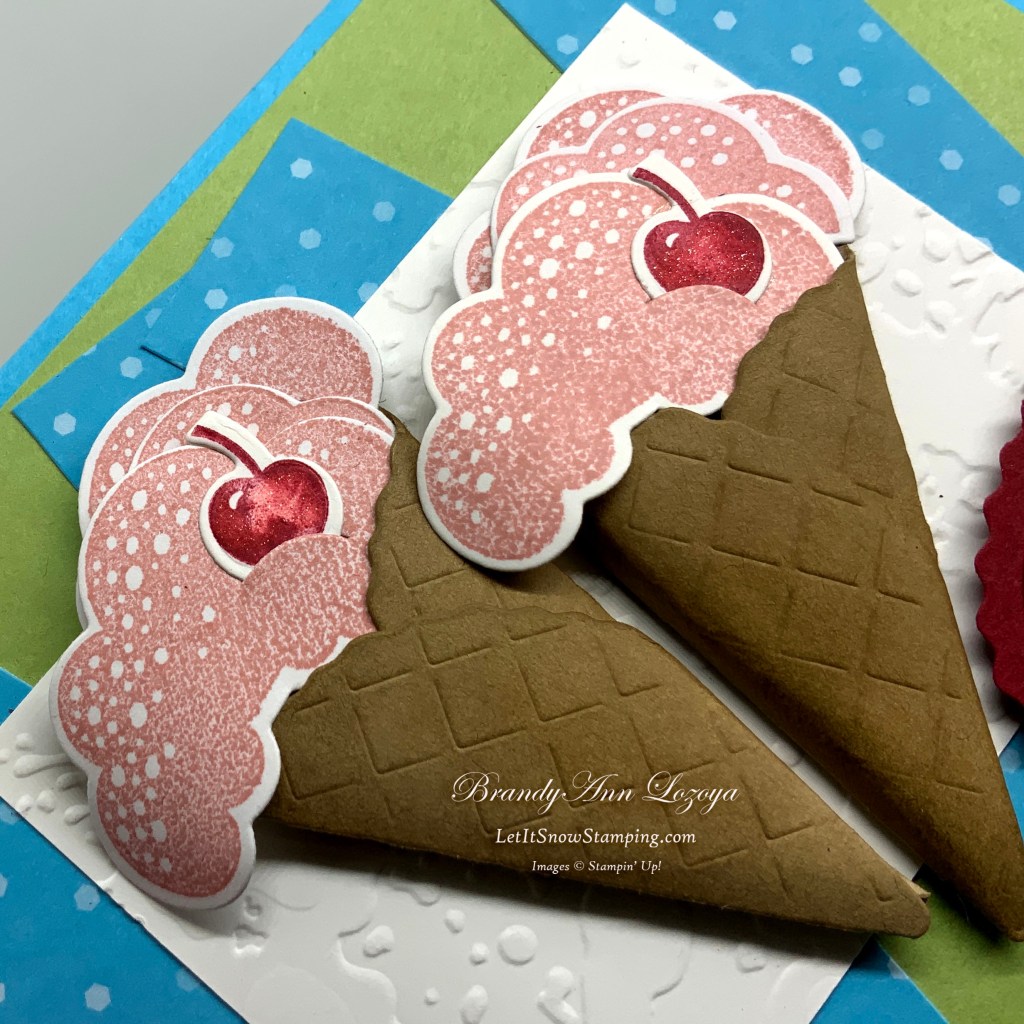

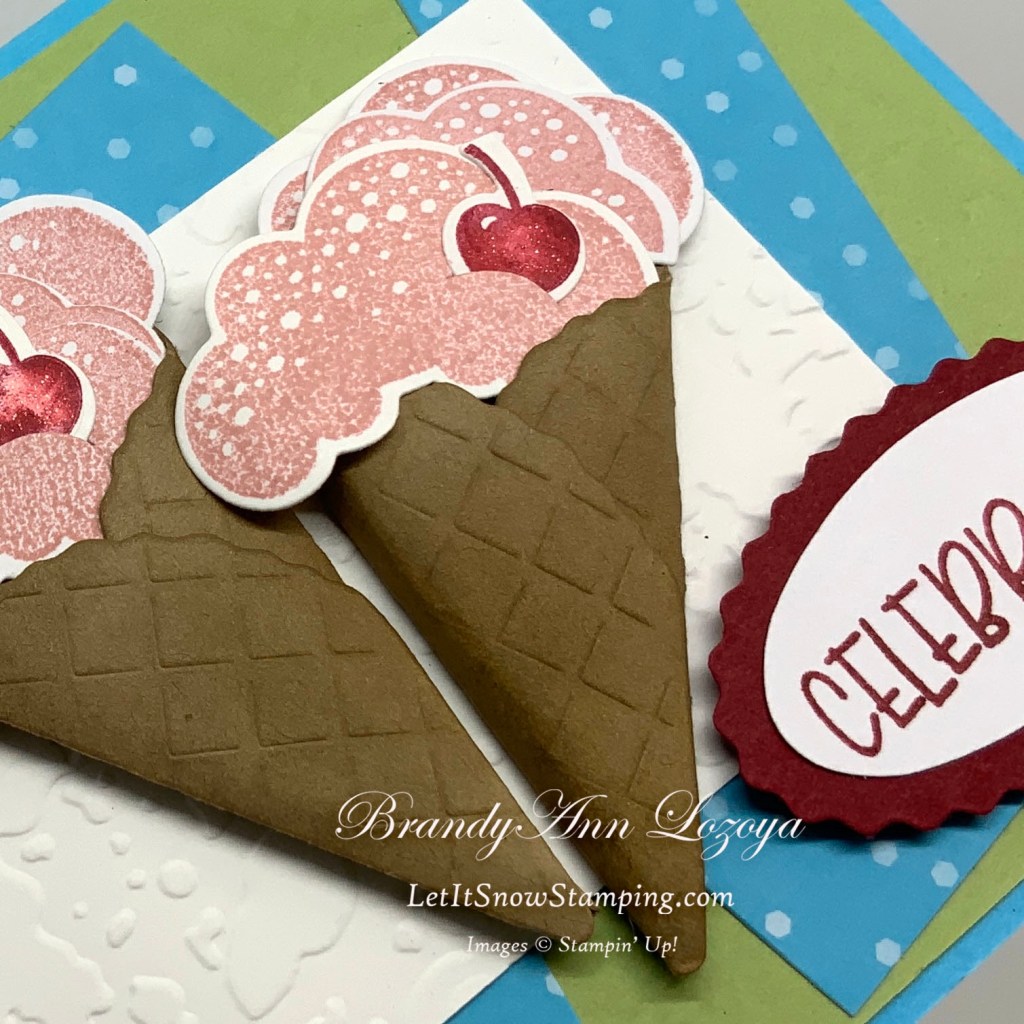


Today’s card was so much fun to make! I really like how the bowed waffle cone looks with the ice cream layered inside and overflowing off the edge. Makes me want to go get a waffle cone in the one digit temps we have outside right now, LOL!
Have a Stamptastic Day!
~BrandyAnn
Subscribe to LISS today!
Make sure to subscribe to Let It Snow Stamping so you never miss another blog post. Every week I pick a stamp set and make one project every weekday. As an added bonus I also make videos for new techniques. The techniques can also be found under the Technique Corner tab. Enter Email Below to Subscribe!
When ordering use my name and the January 2023 host code for extra Benefits!
BrandyAnn Lozoya
EVWWHJNT
Make sure you find LISS on:
Facebook (#LISStamping, @LetItSnowStamping),
Instagram (@LetItSnowStamping),
YouTube (@LetItSnowStamping)
