Happy Martin Luther King Jr. Day! Is everyone enjoying their 3-day weekend? Here, my youngest had a 4-day weekend because they had a teacher institute day on Friday. Tomorrow, it is back to reality with having to get up at 6:30am to make sure Little One is up and running. Thank goodness he is self sufficient with showers and breakfast! I just have to make sure he is up and out of bed, then I go back to bed until it’s my turn to shower. Yes, I’m spoiled!
Today’s project
I have seen so many cute samples with this week’s set. Quite Curvy from Stampin’ Up! has a lot of cute projects on Pinterest using the wavy dies. Unfortunately, I didn’t want to use the curvy dies for my first project. This project is one of those that had to grow on me before I decided I liked it. I had fun making it, but my brain and hands were having a disconnect today that no amount of coffee or tea was going to fix!
I recently got the Basic Pattern Decorative Masks from this year’s Annual Catalog. I love to collect these masks because they provide so many choices when making backgrounds. Remember, I like to collect pattern paper, not actually use it, so I try not to buy much (HaHaHa), so making my own backgrounds is what I like to do. Most of the samples on Pinterest use some sort of pattern paper, which is kind of a bummer for me.
To make the background, I taped the cardstock to my glass mat like so…

Then folded the card base closed and taped the mask (stencil) on top of that.

The masks measure 6″x6″ so there is plenty of overhang to tape down without taping over the card base front that measures 4-1/4″x5-1/2″.
I love my painter’s tape and use it all the time! It is cheaper than temporary adhesives and I can reuse it over and over. These pieces moved over to my Big Shot to help hold down dies, because even with the magnetic base, sometimes the little buggers move!
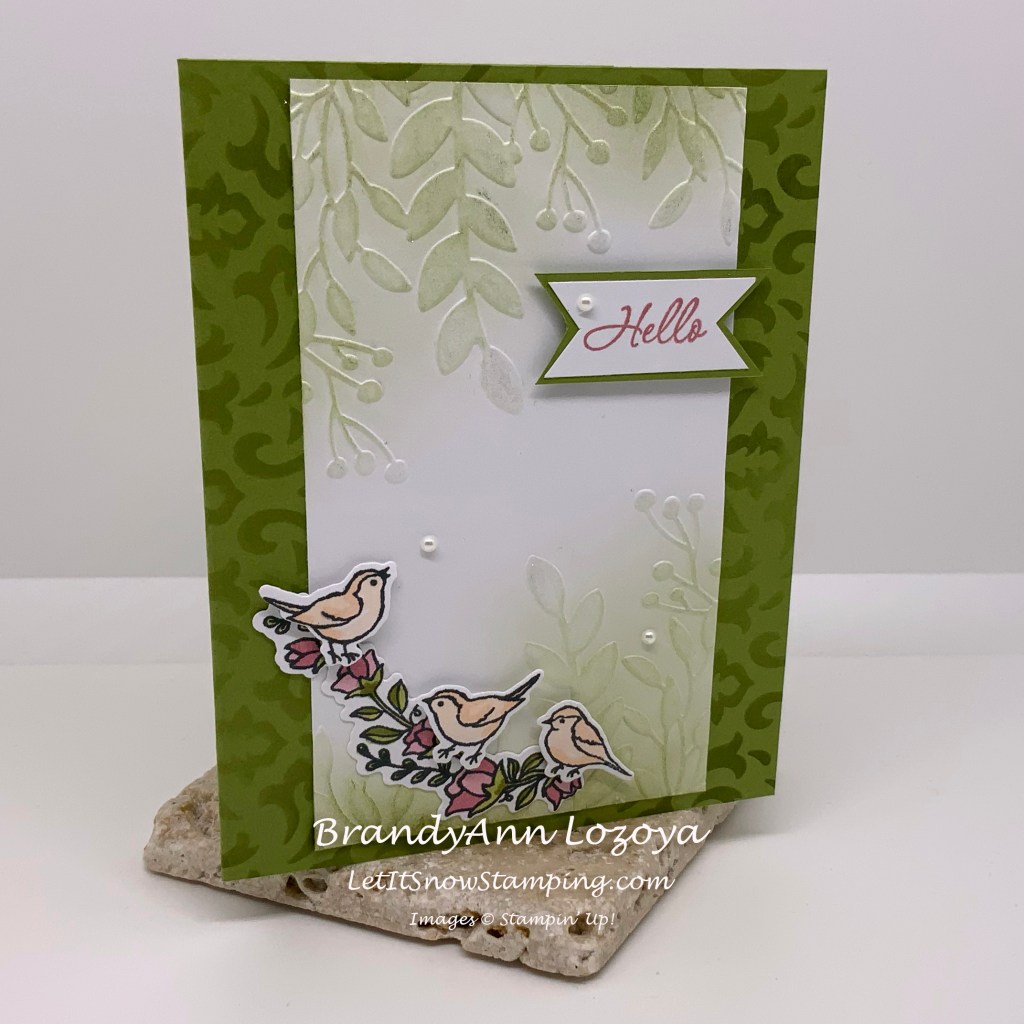
Next, I decorated my card front that measures 3″x5-1/4″. I ran it through the Big Shot using the Greenery Embossing Folder. Then I broke out my blending brushes again. I really am loving them more than I thought I would! My poor daubers are feeling neglected! With the blending brushes I highlighted the embossed leaves with Old Olive ink. Then gave them a once over with my Wink of Stella Pen to add some shine.

Next I stamped my sentiment on a piece of scrap paper, using Rococo Rose, and matted it. Yeah, the mat didn’t come out so good, but it gives it character! Right?!?! I attached it with foam tape.

Don’t you just love these little birdies? They look like they are having a party on the flowered branch. Not exactly 6 feet apart, but there is some social distancing! They were stamped in Momento Tuxedo Black and colored in using Stampin’ Blends.
The branch was stuck down flat and the birds have foam tape to make them a little 3D-ish.
Lastly, I added 3 Pearl Basic Gems to accent the card.

If there are ever any techniques that you are not sure of, please leave a comment below and I will make a short video to show you. It can even be a request for something not shown on today’s blog. I simply love making sure you learn as much as you possibly can about this awesome hobby!!
