Happy Stampin’ Monday!
Today has been one stressful Monday, ugh. My youngest went back to in-school class today. Being high risk, we kept him home doing remote school. Since the end of the year is approaching, I did not want him to miss the end of the year activities with his friends. He was so excited and really enjoyed going back, so it was totally worth the anxieties!
Now time relax and show you what I was able to make to keep my mind busy today.
Supplies:
- Basic White Cardstock
- Pattern Party Designer Series Paper
- Polished Pink Cardstock
- Basic Black Cardstock
- Mango Madness, Polished Pink, and Granny Apple Green Classic Stampin’ Pads
- VeraMark Pad
- White Emboss Powder
- Painted Texture 3D Embossing Folder
- Stampin’ Dimensionals
- Seal Adhesive
- Silver Epoxy Essentials
- Daisy Punch
- Heat Tool
- Simply Scored Scoring Tool
Instructions:
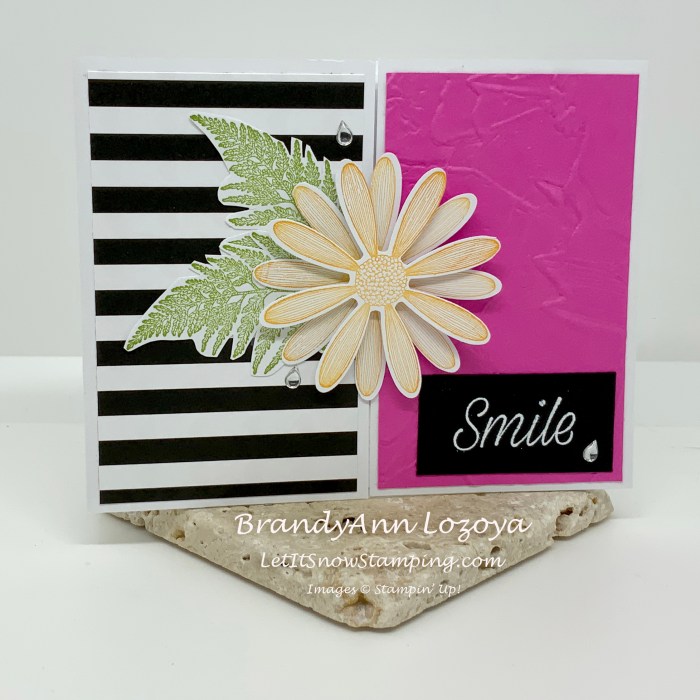
Cut your sheet of Basic White Cardstock to 11″x4-1/4″. Score it at 2-3/4″ and at 8-1/4″.

Fold the two sides inward and burnish at the folds. Make sure to line the second side up to the first to minimize the gap.

Cut a piece of DSP and a piece of Polished Pink Cardstock to measure 2-1/2″x4″. Run the Polished Pink Cardstock through the embossing machine with the Painted Texture 3D Embossing Folder.

Glue the two rectangles to the front flaps of the card base and set aside.

Stamp two daisies onto the Basic White Cardstock using Mango Melody ink. Punch both out using the Daisy Punch.

Add a Stampin’ Dimensional to one of the daisies and attach the other on top of the first at an offset angle.

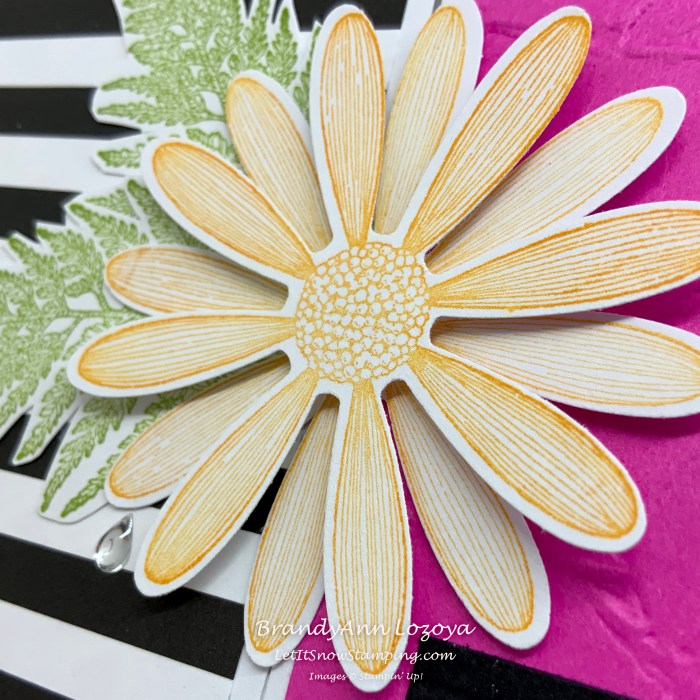
Stamp two leaves in Granny Apple Green onto a scrap of Basic White Cardstock.

Fussy cut them out (cut by hand with scissors). I do not have the patience for fussy cutting, so mine will not be perfect :)!

Arrange the leaves to overlap each other and tape on the backside to hold them together.

Glue them to the daisies and adhere them to the DSP side of the card front. Make sure you do not have the leaves with the adhesive on the Polished Pink side, or your card will not open.

Here is what the inside flap should look like with half of the daisies hanging off the side.

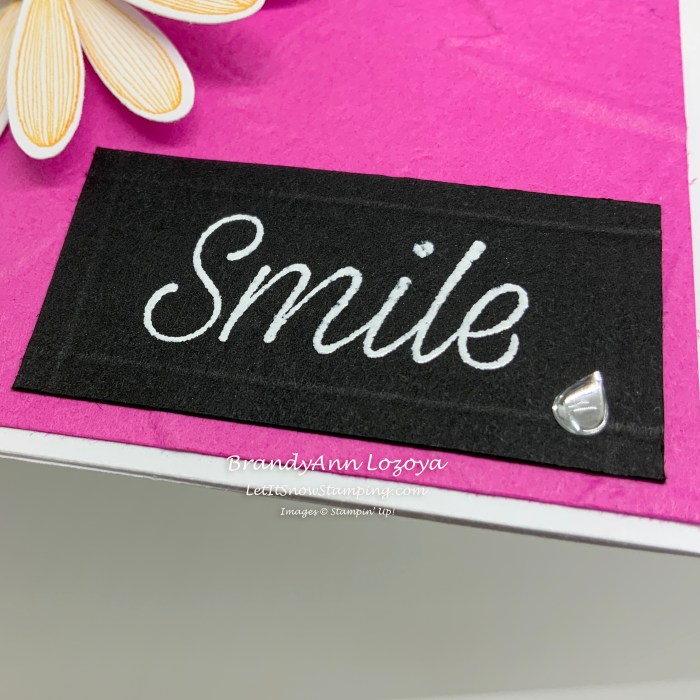
On a 2″x1″ piece of Basic Black Cardstock, stamp the “Smile” senitment using VersaMark. Then, sprinkle with the white embossing powder and heat set with a Heat Tool until the embossing powder is smooth.
To make the dry embossed lines, I placed the rectangle on my Scoring Tool and scored a line 1/4″ from each side.
Adhere to the card front using Seal Adhesive.
Optional: On a 5-1/4″x4″ piece of Basic White Cardstock, stamp a sentiment (Polished Pink) and the smaller daisy (Mango Melody) as shown below. Adhere this to the inside of your card.

Add three Silver Epoxy Essentials Raindrops to the card front to finish off.

I hope you enjoyed today’s project. Make sure to subscribe to Let It Snow Stamping so you never miss another blog post. Every week I pick a stamp set and make one project (possibly two) every weekday. As an added bonus I also make videos for new techniques. The techniques can also be found under the Technique Corner tab.
Make sure you find LISS on:
Facebook (#LISStamping, @LetItSnowStamping),
Instagram (@LetItSnowStamping),
