Happy Stampin’ Monday!
I hope everyone is having a wonderful Monday! I am so excited to be working again. Today I started a new job, outside of the house. When COVID hit last year, I found that I could not wear a mask for more than about an hour because it triggered my asthma, as did all of the new cleaners we had to use to disinfect everything daily. Because I worked with people who were vulnerable, I needed to wear my mask during work hours. After about a month, I had to resign from the job that I loved and have been home ever since.
Of course being at home has allowed me to build my wonderful community, Let It Snow Stamping, so I am grateful. I have met so many new friends and filled my heart. Best of all, I have been able to still help others. I truly enjoy helping stampers learn to create beautiful things and I hope I can continue to do that. That being said, I hope you will sign up for the newsletter to continue to receive the step-by-step instructions I so enjoy doing. I found this to be the best way for me to still help you learn how to recreate my projects while taking on a full time job. Also, if you are not a part of the other LISS communities on social media, make sure you check LISS out on IG, FB, Twitter, etc. All of the direct links can be found below!
See you soon!
~BrandyAnn
The Project
Level – Casual (intermediate)

Supply List
- Stamp Sets
- Forever Fern Stamps Set
- Dies/Embossing Folder
- Stitched So Sweetly Dies
- Cardstock/DSP
- Old Olive
- Mossy Meadow
- Basic White
- Stamp Pads
- Mossy Meadow
- Old Olive
- Embellishments
- Brushed Metallic Adhesive-Backed Dots
- Adhesive
- Stampin’ Seal
- Stampin’ Dimensionals
- Tools
- Bone Folder
- Tweezers
- Clear (Acrylic) Blocks D & H
- Paper Snips Scissors
- Paper Trimmer
- Simply Scored Scoring Tool
- Stampin’ Cut & Emboss Machine
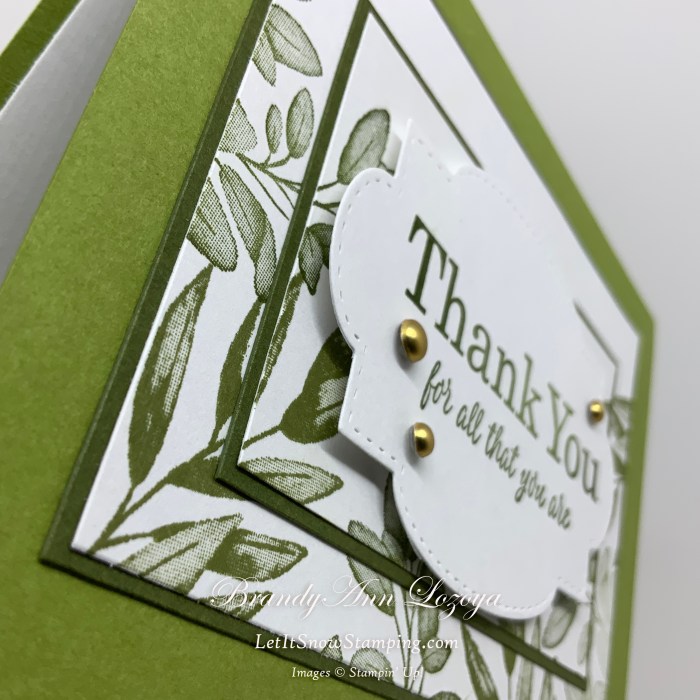
Close-Up & personal
This stamping technique is a favorite of mine. It is actually pretty easy to do. You simply stack your white layers on top of each other as you stamp. Once that is done, you add solid cardstock mats between the layers. (Make sure to sign up for the newsletter to get the step-by-step directions)
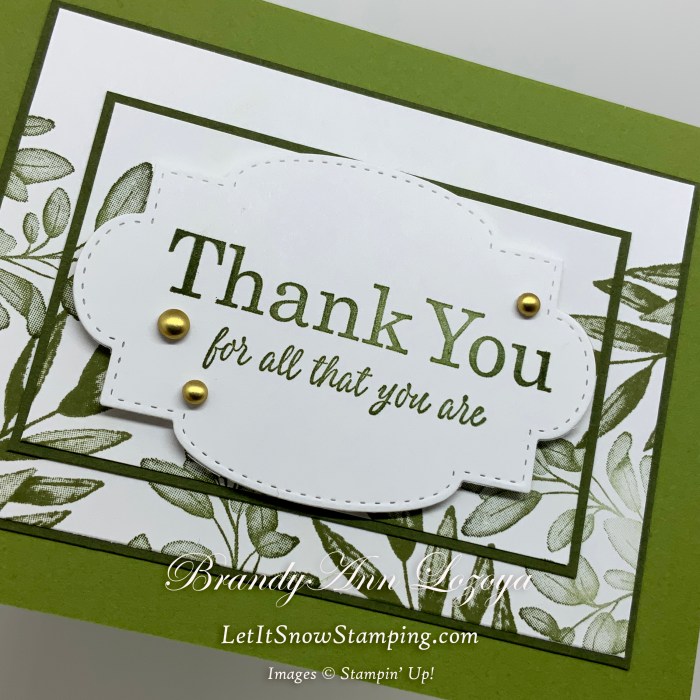
I stamped 6 leaf branches, 3 of each color.

Dimensionals helped pop up the sentiment and you just have to love the Brushed Metallic Dots. I honestly did no think I would ever use them when I first got them. I am a silver girl and don’t really like gold or bronze, lol.
If you recreate this project, please show me! I’d love to see what you create :)
Have a Stamptastic day!
~BrandyAnn
Join the LISS Newsletter!
When you sign up for the Weekly Newsletter you will receive links to the step-by-step instructional PDFs on all of my creations. What’s great about this is that you can save the files to your computer to use anytime you’d like, or print them and place them in a binder.
If you are interested in receiving the newsletter, enter your email below.

When ordering use my name and the October 2021 host code for extra benefits
BrandyAnn Lozoya
DKGKTMQ2
I hope you enjoyed today’s project. Make sure to subscribe to Let It Snow Stamping so you never miss another blog post. This is different from the Weekly Newsletter. Every week I pick a stamp set and make one project every weekday. As an added bonus I also make videos for new techniques. The techniques can also be found under the Technique Corner tab.
Make sure you find LISS on:
Facebook (#LISStamping, @LetItSnowStamping),
Instagram (@LetItSnowStamping),
