Happy Stampin’ Thursday!
Today is the day! I have the Double Triangle Fold for you as promised yesterday. I also have a sneak peak of three of the new 2021-2023 In Colors! They will be available for purchase beginning May 4th, 2021.
The three In Colors I am using today are Fresh Freesia, Polished Pink, and Soft Succulent.

To begin the Double Triangle Fold, we start with a sheet of 8-1/2″x11″ cardstock. On the 11″ side I scored it at 5-1/2″. Then I turned it 90 degrees and scored the 8-1/2″ side at 4-1/4″.

Next, we will make a diagonal cut using either a ruler and Exacto knife, or your trimmer if the edges will fit. Just noticed my Stampin’ Up! hoodie made an appearance in this photo, LOL!

It should look like this when you are done cutting. These two pieces will make two card bases.

Next we will fold the card base at one of the scored lines. It is very important for the folds to line up to the edges of the paper properly for a nice clean finish.

Ugh, please excuse my non manicured hands! It is Spring and they never look good in the Spring, LOL.
Next, we will fold the other scored mark. With this one, I not only line up the edges, but I also line it up to the diagonal edge of the first fold. This helps make a nice corner on the upper left side so it does not leave a gap.

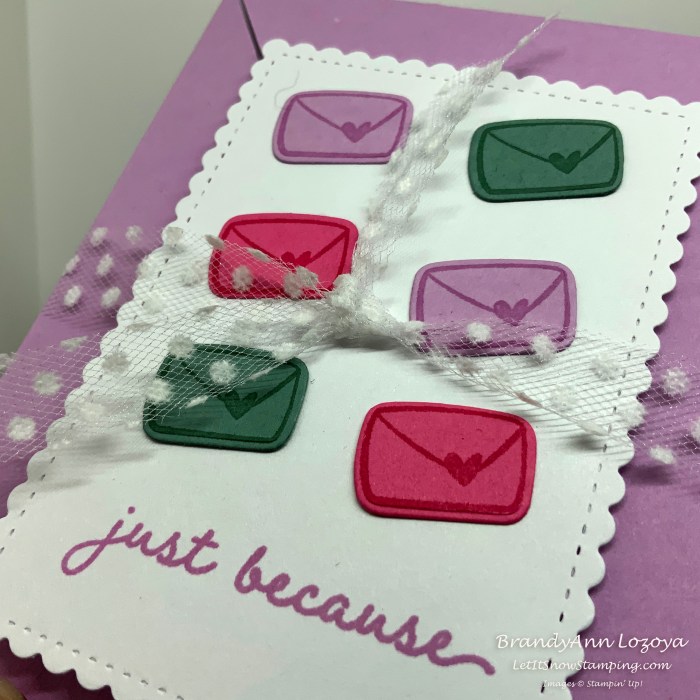
I saw a similar design for the card front on Pinterest and thought it would make a good element for this Double Triangle Fold. I started out with the largest scalloped rectangle from the Stitched So Sweetly Die set and cut out a Basic White rectangle.

Next, on 1″ strips of Fresh Freesia, Polished Pink, and Soft Succulent, I stamped the letter portion of the “Happy Mail Enclosed” stamp from the Snailed It cling stamp set using the matching stamp pad. Then, cut them out using the coordinating die. I made three letters in each color.
Next, I stamped my sentiment across the bottom of the scalloped rectangle in Fresh Freesia. I glued the letters on with Glue Dots.
To finish up the card front, I glued it to the Fresh Freesia Card base using Stamping’ Dimensionals. Make sure to only put dimensional on the top flap side of the scalloped rectangle.

Here is what it looks like when you open it up. Make sure you add a stamped image on the inside or a centered sentiment. This card has plans of being written in from corner to corner, so I did not add anything to this one. I love to write; my pen pals can attest to that!

In order to help it stay closed, I added a ribbon belly band. On another one I made, I put my decorated sentiment on a cardstock belly band. I would show you, but I just put it in the mail today and totally forgot to take a picture of it!
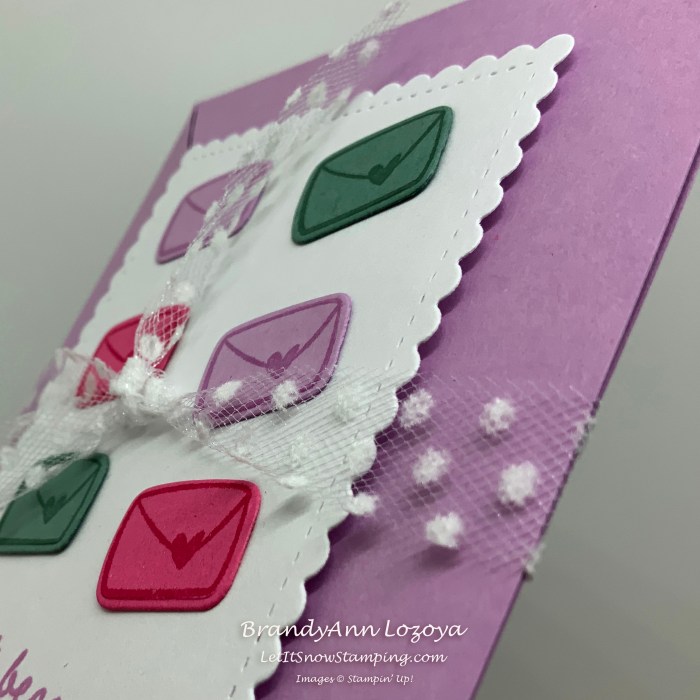
I am so sad to see the Polka Dot Tulle on the retired list! When I saw it on there, I ordered 3 more rolls right away! I love this tulle because it adds such a sweet element to the card without over powering it.
I hope you enjoyed today’s project. Make sure to subscribe to Let It Snow Stamping so you never miss another blog post. Every week I pick a stamp set and make one project (possibly two) every weekday. As an added bonus I also make videos for new techniques. The techniques can also be found under the Technique Corner tab.
Make sure you find LISS on:
Facebook (#LISStamping, @LetItSnowStamping),
Instagram (@LetItSnowStamping),
When ordering use my name and the April 2021 host code for extra benefits
BrandyAnn Lozoya
PBWMEMGN
* The new In Colors will not be listed in the supply list, as they are not available to order until May 4, 2021.

One thought on “Snailed It Week – Project 4”