Happy Stampin’ Friday!
Do you have any exciting plans for the weekend? I will be designing and finishing up my swaps from the pre-order items I ordered from the new 2021-2022 Annual Catalog. I will have lots of new samples to share from you when the new catalog launches May 4th! As a demonstrator, I am able to place a pre-order roughly about a month before a new catalog launches. It is one of many perks of being a demonstrator!
Customers who have placed a $50+ order with me in the last 6 months should be receiving their 2021-2022 Annual soon, if they have not already. It is a wonderful treasure-trove of wonderful ideas and inspiration. This particular catalog is geared toward the beginner and casual stamper. The projects are spectacular and can be made with only a few supplies! Ordering from this catalog begins May 4th, 2021.
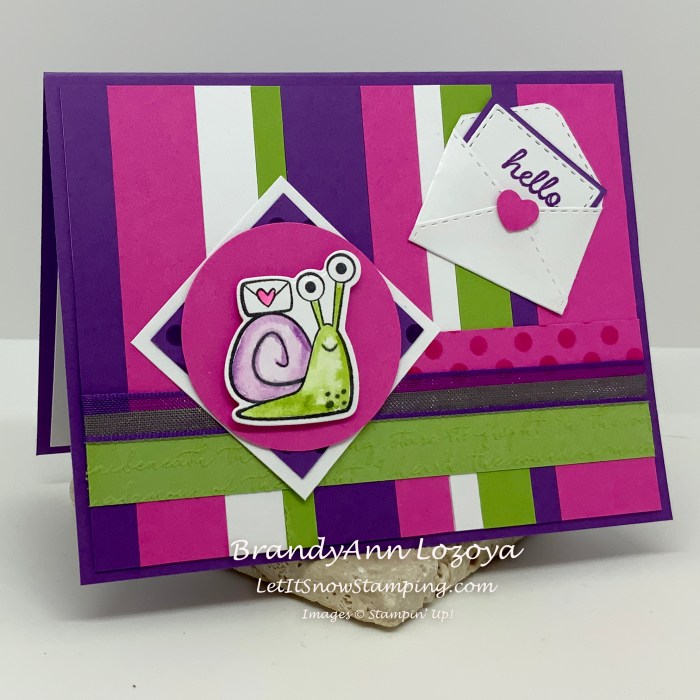
For today’s project, I wanted something bright. Well, this was so bright that I had to keep walking away from it and coming back to it, LOL! And wouldn’t you know it, I just noticed while looking at this photo that I forgot to add my cheater bow! Yeah, it’s Friday! Oh well, it still came out cute!
I am going to start you off today with making the strip background. This technique is a wonderful way to use up all of the lovely little scraps we just hate to toss in the garbage. You can do this in any pattern. I have seen the strips diagonal, landscape, and even in a quilt pattern! You can do it with cardstock and Designer Series Paper bits. Some people leave gaps between the stripes, but I like to have them touching because my OCD would drive me nuts trying to make sure the gaps were straight!
We start out with a piece of cardstock, any color will do. I used Basic White and it measures 4″x5-1/4″. Next we will add your favorite adhesive to it. I used my tape runner because that is what I had handy and I am a disaster with liquid glue! Add colored strips to the Basic White base as shown.

When we are finished adding the strips, this is what the backside will look like.

Next, we will take our favorite scissors and cut along the edge of the white cardstock to trim the overhang of the strips.

We are left with this beautiful (and bright) card front background.

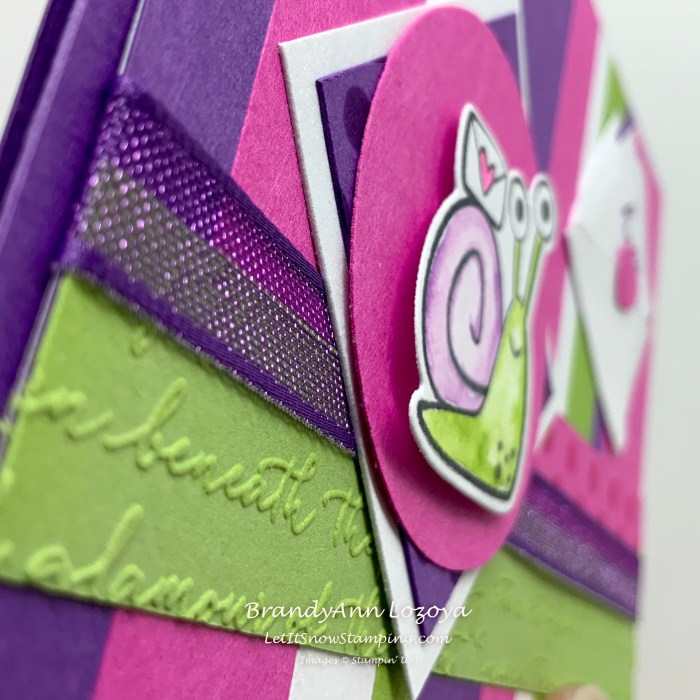
Next, using a scrap of Granny Apple Green, run it through the Scripty 3D Embossing Folder and cut to 5-1/4″x3/4″ and glue to the lower half of the card front.
Using the Basic Pattern Decorative Masks dot mask, create a textured background using a dauber and Magenta Madness ink on a strip of Magenta Madness you see to the right of the snail. I think that strip is 1/2″ wide. Then, glue down the Magenta Madness strip above the Granny Apple Green strip. This strip does not go all the way across. It stops behind the snail element.
Then, using Gorgeous Grape Sheer Ribbon, stretch it along the card front, centering it between the Granny Apple Green strip and the Magenta Madness strip. Tape the ends on the backside of the card front.
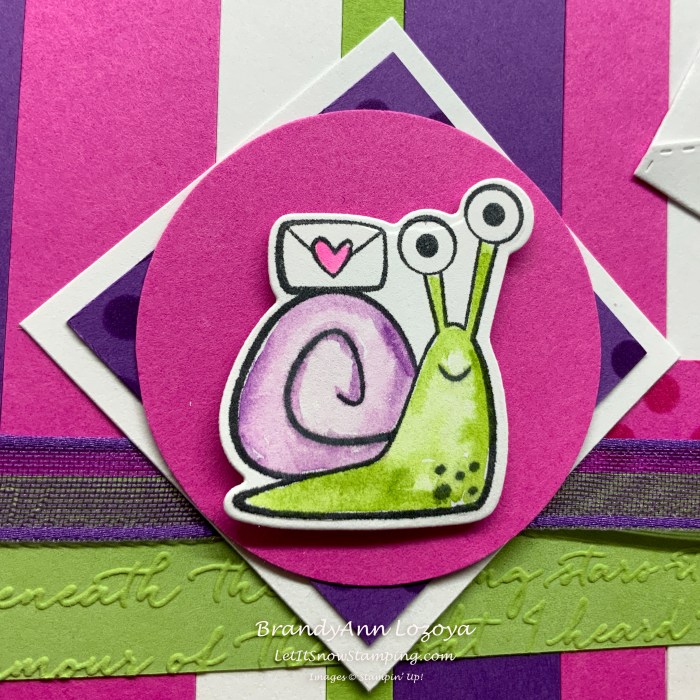
Next, we will take a scrap of Basic White cardstock and stamp our little snail image in Memento Tuxedo Black ink and color him in using a water painter/brush and ink pads. If you are not sure what that is, check out the Snailed It Week – Project 2 blog post. Then we will cut him out using the coordinating dies.
Using the 2″ Circle Punch, punch out a circle in Magenta Madness. Adhere the snail using Stampin’ Dimensionals to the center of the circle.
Then cut a 1-3/4″x1-3/4″ square of Gorgeous Grape cardstock and a 2″x2″ square of Basic White. Using the same dot mask, texturize the Gorgeous Grape square in matching ink. Layer all of the elements and glue them together, then mount them to the left side of the card.
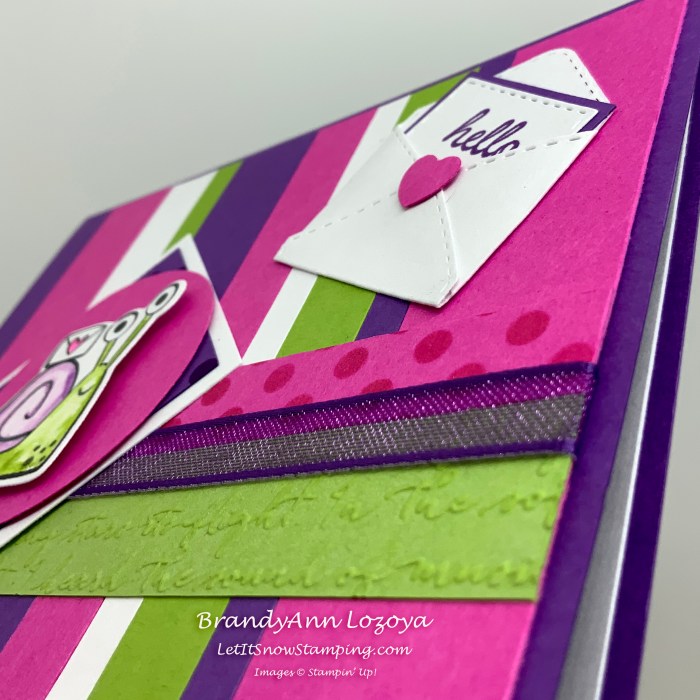
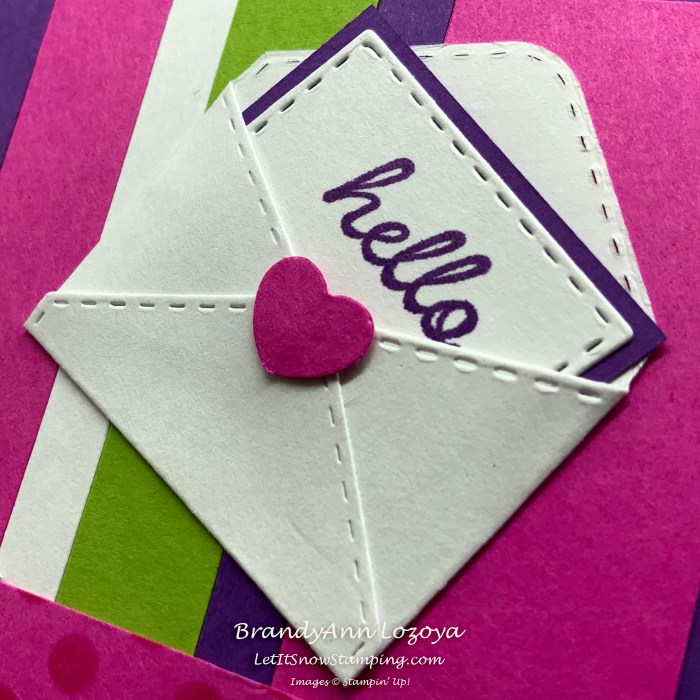
Using another scrap of Basic White and the Snail Dies set, cut out an envelope and letter. Stamp the sentiment in Gorgeous Grape and mat on a scrap of Gorgeous Grape. Trim mat to desired size using a ruler and craft knife or a paper trimmer. Just make sure it fits in the envelope. Tuck the sentiment into the envelope and glue it in. Using the Dog Builder Punch, cut out the heart shape in Magenta Madness and glue to the envelope using a Glue Dot.
Adhere completed letter and envelope to the card front on the upper right hand side at an angle.
Here is the completed card.

I hope you enjoyed today’s project. Make sure to subscribe to Let It Snow Stamping so you never miss another blog post. Every week I pick a stamp set and make one project (possibly two) every weekday. As an added bonus I also make videos for new techniques. The techniques can also be found under the Technique Corner tab.
Make sure you find LISS on:
Facebook (#LISStamping, @LetItSnowStamping),
Instagram (@LetItSnowStamping),
