Happy Stampin’ Monday!
This week I will be making a few samples from one of the sets you can earn for free during Sale-A-Bration! With a $50 purchase (before shipping and taxes) these cute little sheep can be yours. If you have an order that totals $100 or more (before shipping and taxes) you can earn the matching Sheep Dies as well! It’s a Win-Win!

The Project:
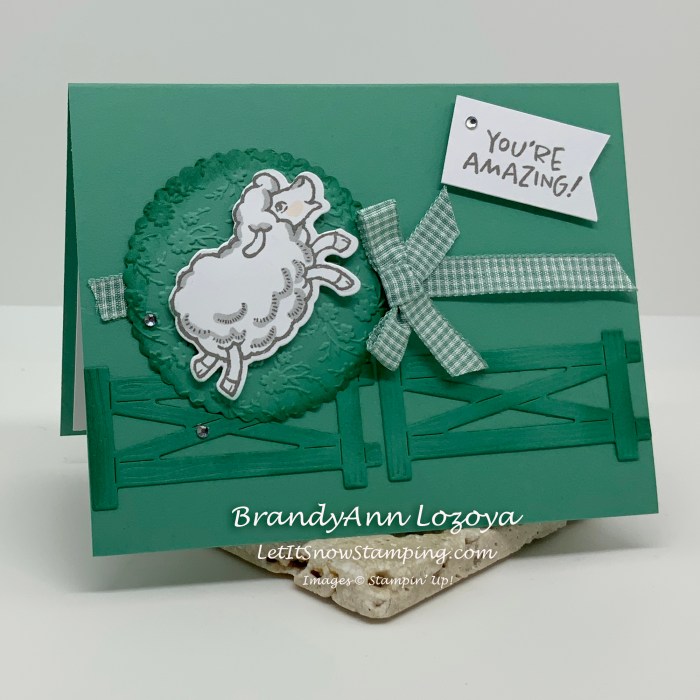
I wanted to try a monochromatic card today. What do you think?
Supply List:
- Counting Sheep Sale-A-Bration Stamp Set
- Sale-A-Bration Sheep Dies
- Cardstock: Just Jade – (5-1/2″x4-1/4″ card base), scraps for die cutting
- Cardstock: Basic White scraps
- Ink: Just Jade & Basic Gray
- Pens: Wink of Stella
- Stampin’ Blends: Light Smoky Slate & Light Petal Pink
- Dies: Layering Circles
- Embossing Folders: Ornate Floral
- Flowers for Every Season gingham ribbon
- Rhinestone Basic Jewels
- Stampin’ Dimensionals
- Blending Brush
- Glue Dots
- Multipurpose Liquid Glue
- Scotch Tape
Instructions:
Score and fold your card base at 4-1/4″, then crease with a bone folder for a crisp card edge.
Using a scrap piece of white cardstock, stamp the jumping sheep image using Basic Gray ink. Die cut the sheep out if you have the Sheep Dies set or fussy cut by hand.
Highlight the wool of the sheep using the Light Smoky Slate Stampin’ Blends. After I took this picture I highlighted the cheeks as well using the Light Petal Pink Stampin’ Blends. I also highlighted areas using the Wink of Stella pen.

Die cut two fence pieces from the Sheep Dies set and the 2-1/2″ scalloped circle die from the Layering Circles Dies set. Next, using the Ornate Floral Embossing Folder, emboss the circle.

Using Stampin’ Dimensionals, adhere the sheep to the circle. On my sample you will notice that this has inked edges. You might want to in the edges BEFORE adhering the sheep, LOL. It will be much easier.

Using a Blending Brush, add a little color to the fences. I use a glass mat because it helps draw in the color left on the mat to blend better. Begin by inking your brush and place it face down on the glass mat and gently brush over the die cuts in a circular motion.

It is not a lot of color, but it helps the fence pieces stand out. Glue fence pieces to the card base. (I’m a little crooked today, ugh).

Make a small bow. Sorry, I did not measure the ribbon before tying as I had it as a left over scrap.

Cut a 6″ length of ribbon and position the sheep on it how you would like it to look. Gently flip both pieces over and tape the ribbon to the back of the circle. Next, add Multipurpose Liquid Glue to the circle and place on card base. I did not add glue to the ribbon, but feel free to do so.

I do not glue down the ribbon so that I am able to trim the edges.

Now, with a Glue Dot, glue the bow to the edge of your circle.

Cut a scrap piece of white cardstock down to the size of your sentiment. This one measures at 1-5/8″x7/8″. Stamp the sentiment in Basic Gray. I trimmed one edge into a banner edge. Adhere to the card base using Stampin’ Dimensionals.
Add rhinestones for a little extra bling!


I hope you enjoyed today’s project. Make sure to subscribe to Let It Snow Stamping so you never miss another blog post. Every week I pick a stamp set and make one project (possibly two) every weekday. As an added bonus I also make videos for new techniques. The techniques can also be found under the Technique Corner tab.
When ordering use my name and the August 2021 host code for extra benefits
BrandyAnn Lozoya
GWHVVMBG
Make sure you find LISS on:
Facebook (#LISStamping, @LetItSnowStamping),
Instagram (@LetItSnowStamping),
