Happy Stampin’ Tuesday!
I hope everyone is having a wonderful week thus far.
This is day two of sharing samples from the Counting Sheep Cling Stamp Set. It is one of the sets you can earn for FREE during Sale-A-Bration! With a $50 purchase (before shipping and taxes) these cute little sheep can be yours. If you have an order that totals $100 or more (before shipping and taxes) you can earn the matching Sheep Dies as well!

The Project:
This is a beginner level card. I added Stampin’ Dimensionals to the sentiment and sheep to pop them out a bit. Stampin’ Dimensionals are an easy way to make your cards pop!

Supply List:
- Counting Sheep Sale-A-Bration Stamp Set
- Sale-A-Bration Sheep Dies
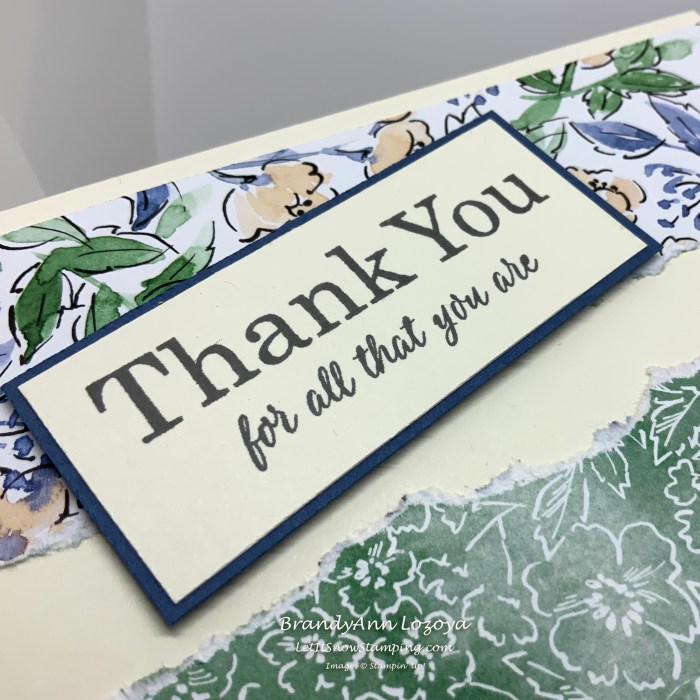
- Very Vanilla Cardstock – Card base 5-1/2″x8-1/2″, scored and folded at 4-1/4″, Sentiment 3″x1-1/4″
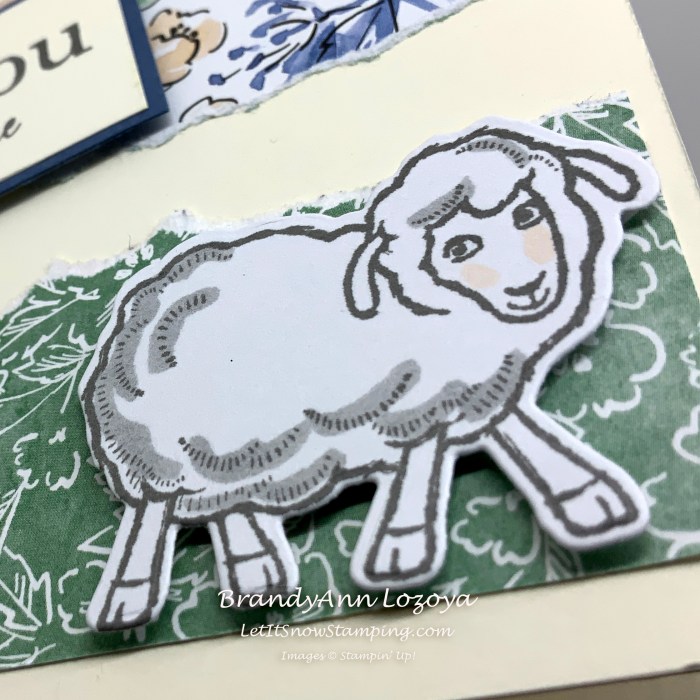
- Scrap of Basic White Cardstock for sheep
- Misty Moonlight Cardstock – Sentiment border 3-1/8″x1-3/8″
- Hand-Penned Designer Series Paper (DSP) – 5-1/4″x4″
- Stampin’ Blends – Light Petal Pink for cheeks & Smoky Slate for sheep shading
- Stampin’ Dimensionals
- Stampin’ Seal adhesive
Instructions:
Fold card base and burnish with a bone folder for a crisp crease.
Tear DSP piece in half. I also torn a bit more to create a gap in the middle for the card base to show through. I like to have the white part of the torn edges to face upward. Practice tearing before hand to see how you need to tear your paper to achieve the white edge.
Glue down the right side piece. Flip over the left side piece, if desired, to show the other side of the DSP, before gluing down.

Stamp sheep in Basic Gray, die cut or fussy cut it out, accent it with the Stampin’ Blends markers.

Next, using the Stamparatus, place the small piece of Very Vanilla on the platform.
Then, place stamp where you would like it on the cardstock.
Next, place magnets on cardstock edges to hold down.


Close the hinged acrylic plate over the stamp to pick it up.
Once the stamp has clung to the plate, gently add ink.


Close the hinged acrylic plate over the cardstock and gently press down to create image. Repeat if image is not bold enough.
Mat sentiment with Misty Moonlight.


Mount to upper left side of the card base. Use Stampin’ Dimensionals, if desired.
Adhere sheep to bottom right corner. Use dimensionals here as well, if desired to add a bit of depth to your card.
The Finished Card:
I hope you enjoyed today’s project. Make sure to subscribe to Let It Snow Stamping so you never miss another blog post. Every week I pick a stamp set and make one project (possibly two) every weekday. As an added bonus I also make videos for new techniques. The techniques can also be found under the Technique Corner tab.
When ordering use my name and the August 2021 host code for extra benefits
BrandyAnn Lozoya
GWHVVMBG
Make sure you find LISS on:
Facebook (#LISStamping, @LetItSnowStamping),
Instagram (@LetItSnowStamping),
