International Blog Highlights – BrandyAnn Lozoya
(Updated September 6, 2021)
Hello everyone and thanks for stopping by the blog today.
I am really excited to be taking part in my first International Blog Highlights.
The theme is all things thanks! and it is so much fun to see all the different blogs that take part and get inspired by all the different creators from around the world!
Be sure to pop by Kylie’s blog to see all the other blogs that have taken part, and if you like my card feel free to vote for it! It is the last one on the list! They saved the best for last :)
The Project
Level – Casual (Intermediate)
Supply List
- Stamp Sets
- Textures & Frames Sale-A-Bration Photopolymer Stamp Set
- Art Gallery Photopolymer Stamp Set
- Die Sets
- Brilliant Wings Dies set
- Stitched So Sweetly Dies set
- Cardstock
- Granny Apple Green – Card Base measures 5-1/2″x8-1/2″, scores and folded at 4-1/4″, scrap piece for large frame
- Gorgeous Grape – Card front mat measures 5-1/4″x4″
- Basic White – Card front measures 5″x3-3/4″, scrap for sentiment and center frame
- Classic Stampin’ Pads
- Granny Apple Green
- Gorgeous Grape
- Coastal Cabana
- Embellishments
- Pearl Basic Jewels
- Snowflake Splendor Ribbon (On Clearance!)
- Adhesive
- Stampin’ Seal
- Mini Stampin’ Dimensionals
- Scotch Tape
- Tools
- Bone Folder
- Paper Snips Scissors
- Take Your Pick Tool
- Paper Trimmer
- Stampin’ Cut & Emboss Machine
Instructions
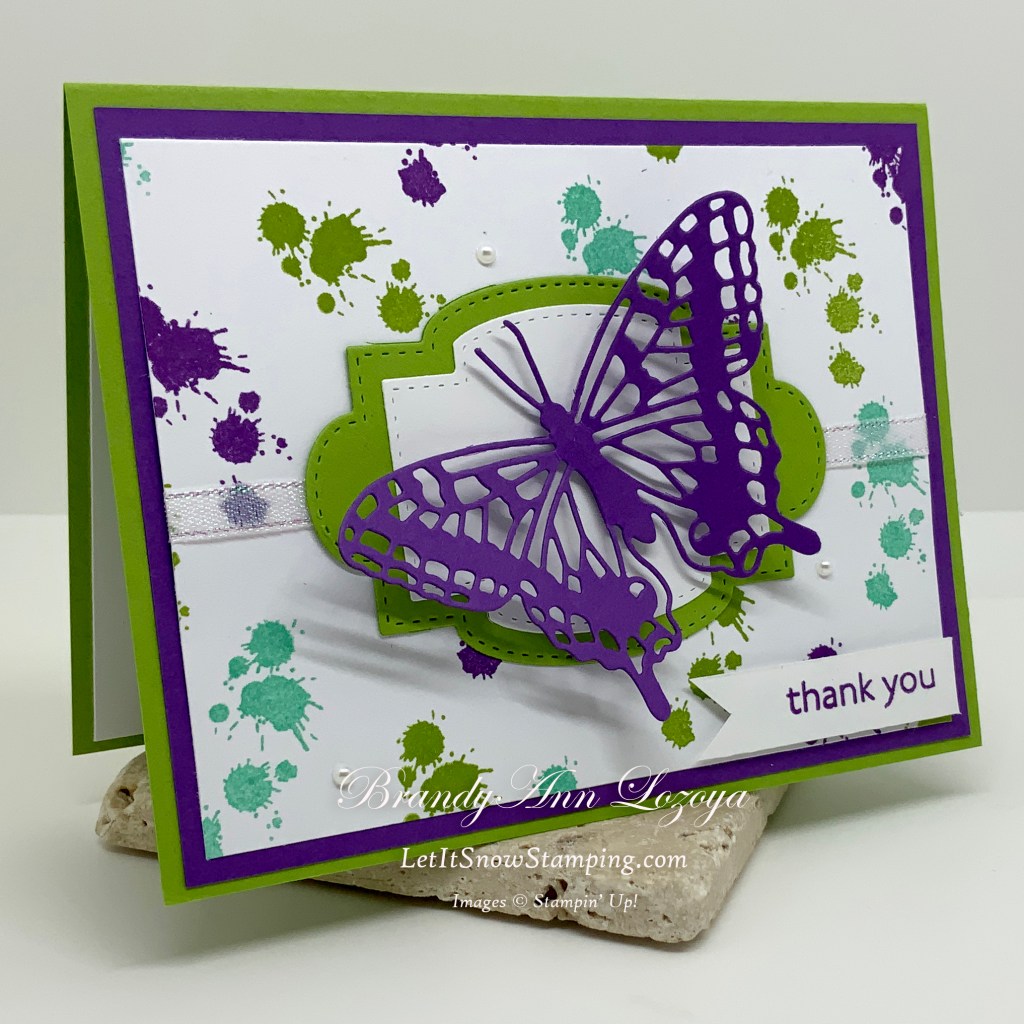
Begin by folding the card base and burnishing it with the bone folder for a nice crisp fold.

Using the splatter stamp from Textures & Frames, stamp with Gorgeous Grape, Coastal Cabana, and Granny Apple Green in a random order. Make sure to have some of the splatters come off the edge.

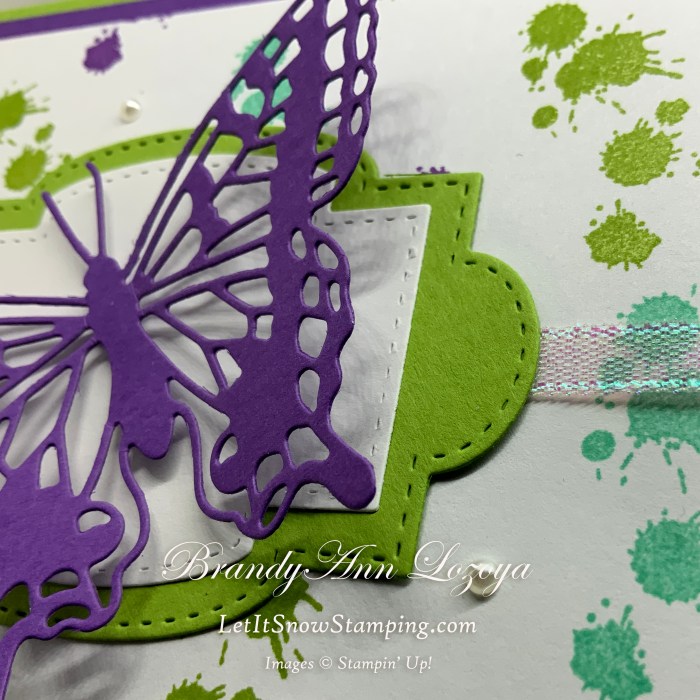
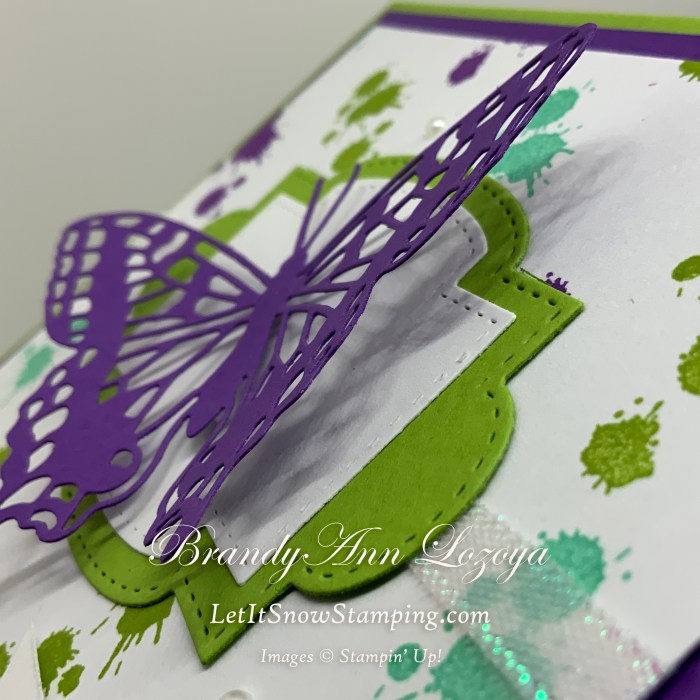
Die cut the largest butterfly die in the middle of the Gorgeous Grape card front mat.

Using the Take Your Pick tool, remove butterfly from die and weed the scraps from the wings.


Mount Gorgeous Grape layer onto green card base.

Cut a 7″ piece of ribbon and secure it to the stamped card front using Scotch Tape.

Mount the white card front to the card base.

Cut out these two shapes from the Stitched So Sweetly Dies set using your Stampin’ Cut & Emboss Machine and glue them together.


Mount them to the card front.

While holding the butterfly’s body, gently bend the wings upward.

Add Mini Stampin’ Dimensionals that have been cut in half on the butterfly body.

Mount butterfly to card front.

On a scrap of white cardstock, stamp sentiment and cut out. I did mine with a banner edge.


Adhere to card front using mini dimensionals. Notice that I used an edge piece for the center. Always use every bit on a dimensional sheet! :)


Add three pearls around the butterfly.

The Final Project


Announcements:
Virtual Party: On September 11, 2021, I will be hosting a Virtual Party where I will be showcasing two projects using two of the holiday bundles from the new July-December Mini Catalog, as well as doing fun giveaways!
If you book an event during the Virtual Party, you will receive one free Classic’ Stampin’ Pad of your choice on top of the regular hostess rewards.
September Special: Buy the Merry Snowflakes Bundle (page 13 in the July-December Mini Catalog) and receive a roll of the White 3/8″ Glittered Organdy Ribbon FREE! (While Supplies Last)
I hope you enjoyed today’s project. Make sure to subscribe to Let It Snow Stamping so you never miss another blog post. Every week I pick a stamp set and make one project every weekday. As an added bonus I also make videos for new techniques. The techniques can also be found under the Technique Corner tab.
When ordering use my name and the August 2021 host code for extra benefits
BrandyAnn Lozoya
A69ERDDQ
Make sure you find LISS on:
Facebook (#LISStamping, @LetItSnowStamping),
Instagram (@LetItSnowStamping),

Oh my gosh! This is just beautiful! I love this color combo. What a fun and happy card!
Thank you! I’m happy it made you smile.
What a bright & cheery card :)
Beautiful card! I love the colors!
Thank you
What a great card. Great use of the stamp set!
Thank you!
Bravo!
I love your beautiful colourful card, Brandy Ann!! Thanks for the great directions!
Thank you!