Step-by-Step Card Making Instructions
Happy Stampin’ Tuesday!
Clearance Rack Refresh
Tomorrow (October 6th) the Clearance Rack will be updated with new items! Supplies are limited, and with discounts up to 60% off, products will go quickly!
October Special
Buy one of the following sets and receive a free roll of the Black & White Gingham Ribbon*
- Penguin Place
- Sweet Little Stockings
- Peaceful Deer
- Strong of Heart
*Orders must be placed via email and not through the online store to receive offer.

Penguin Place 156410 
Sweet Little Stockings 156282 
Peaceful Deer 156891 
Strong of Heart 156376

The Project
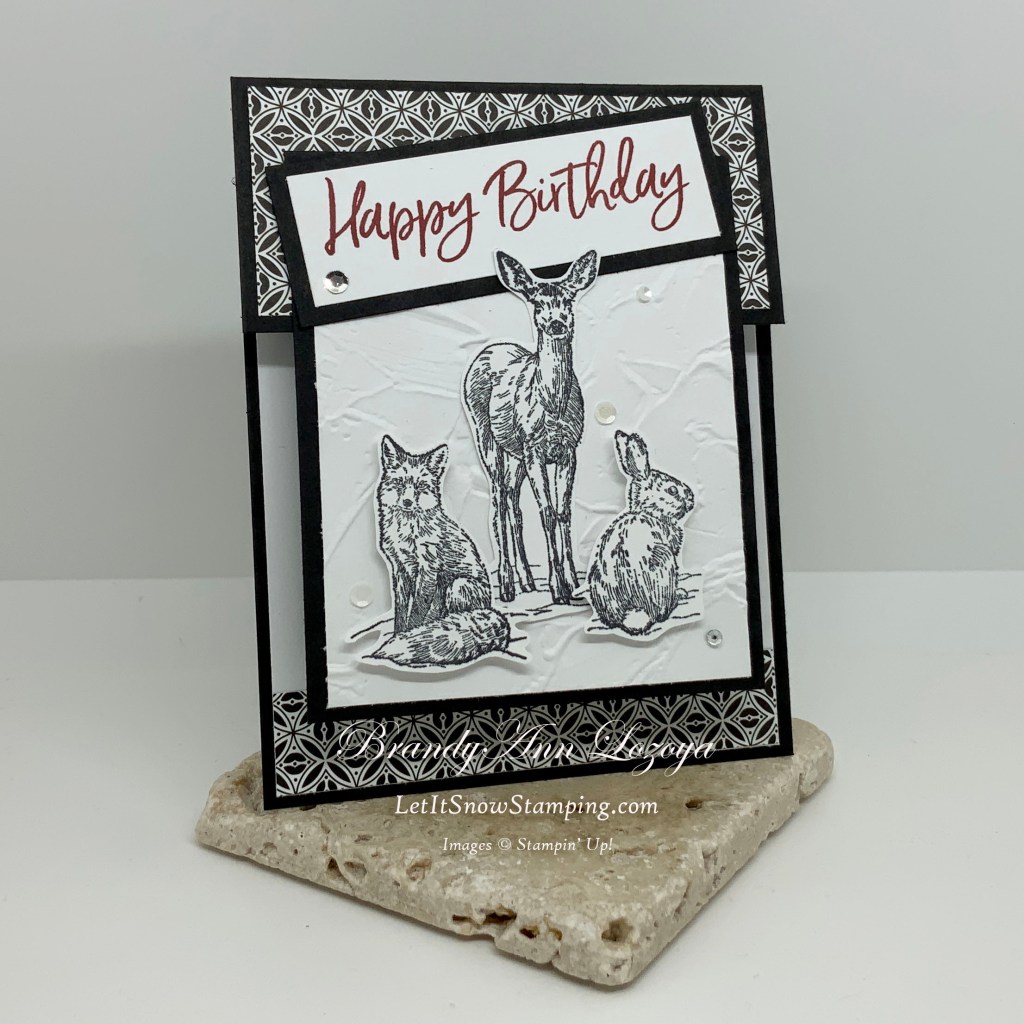
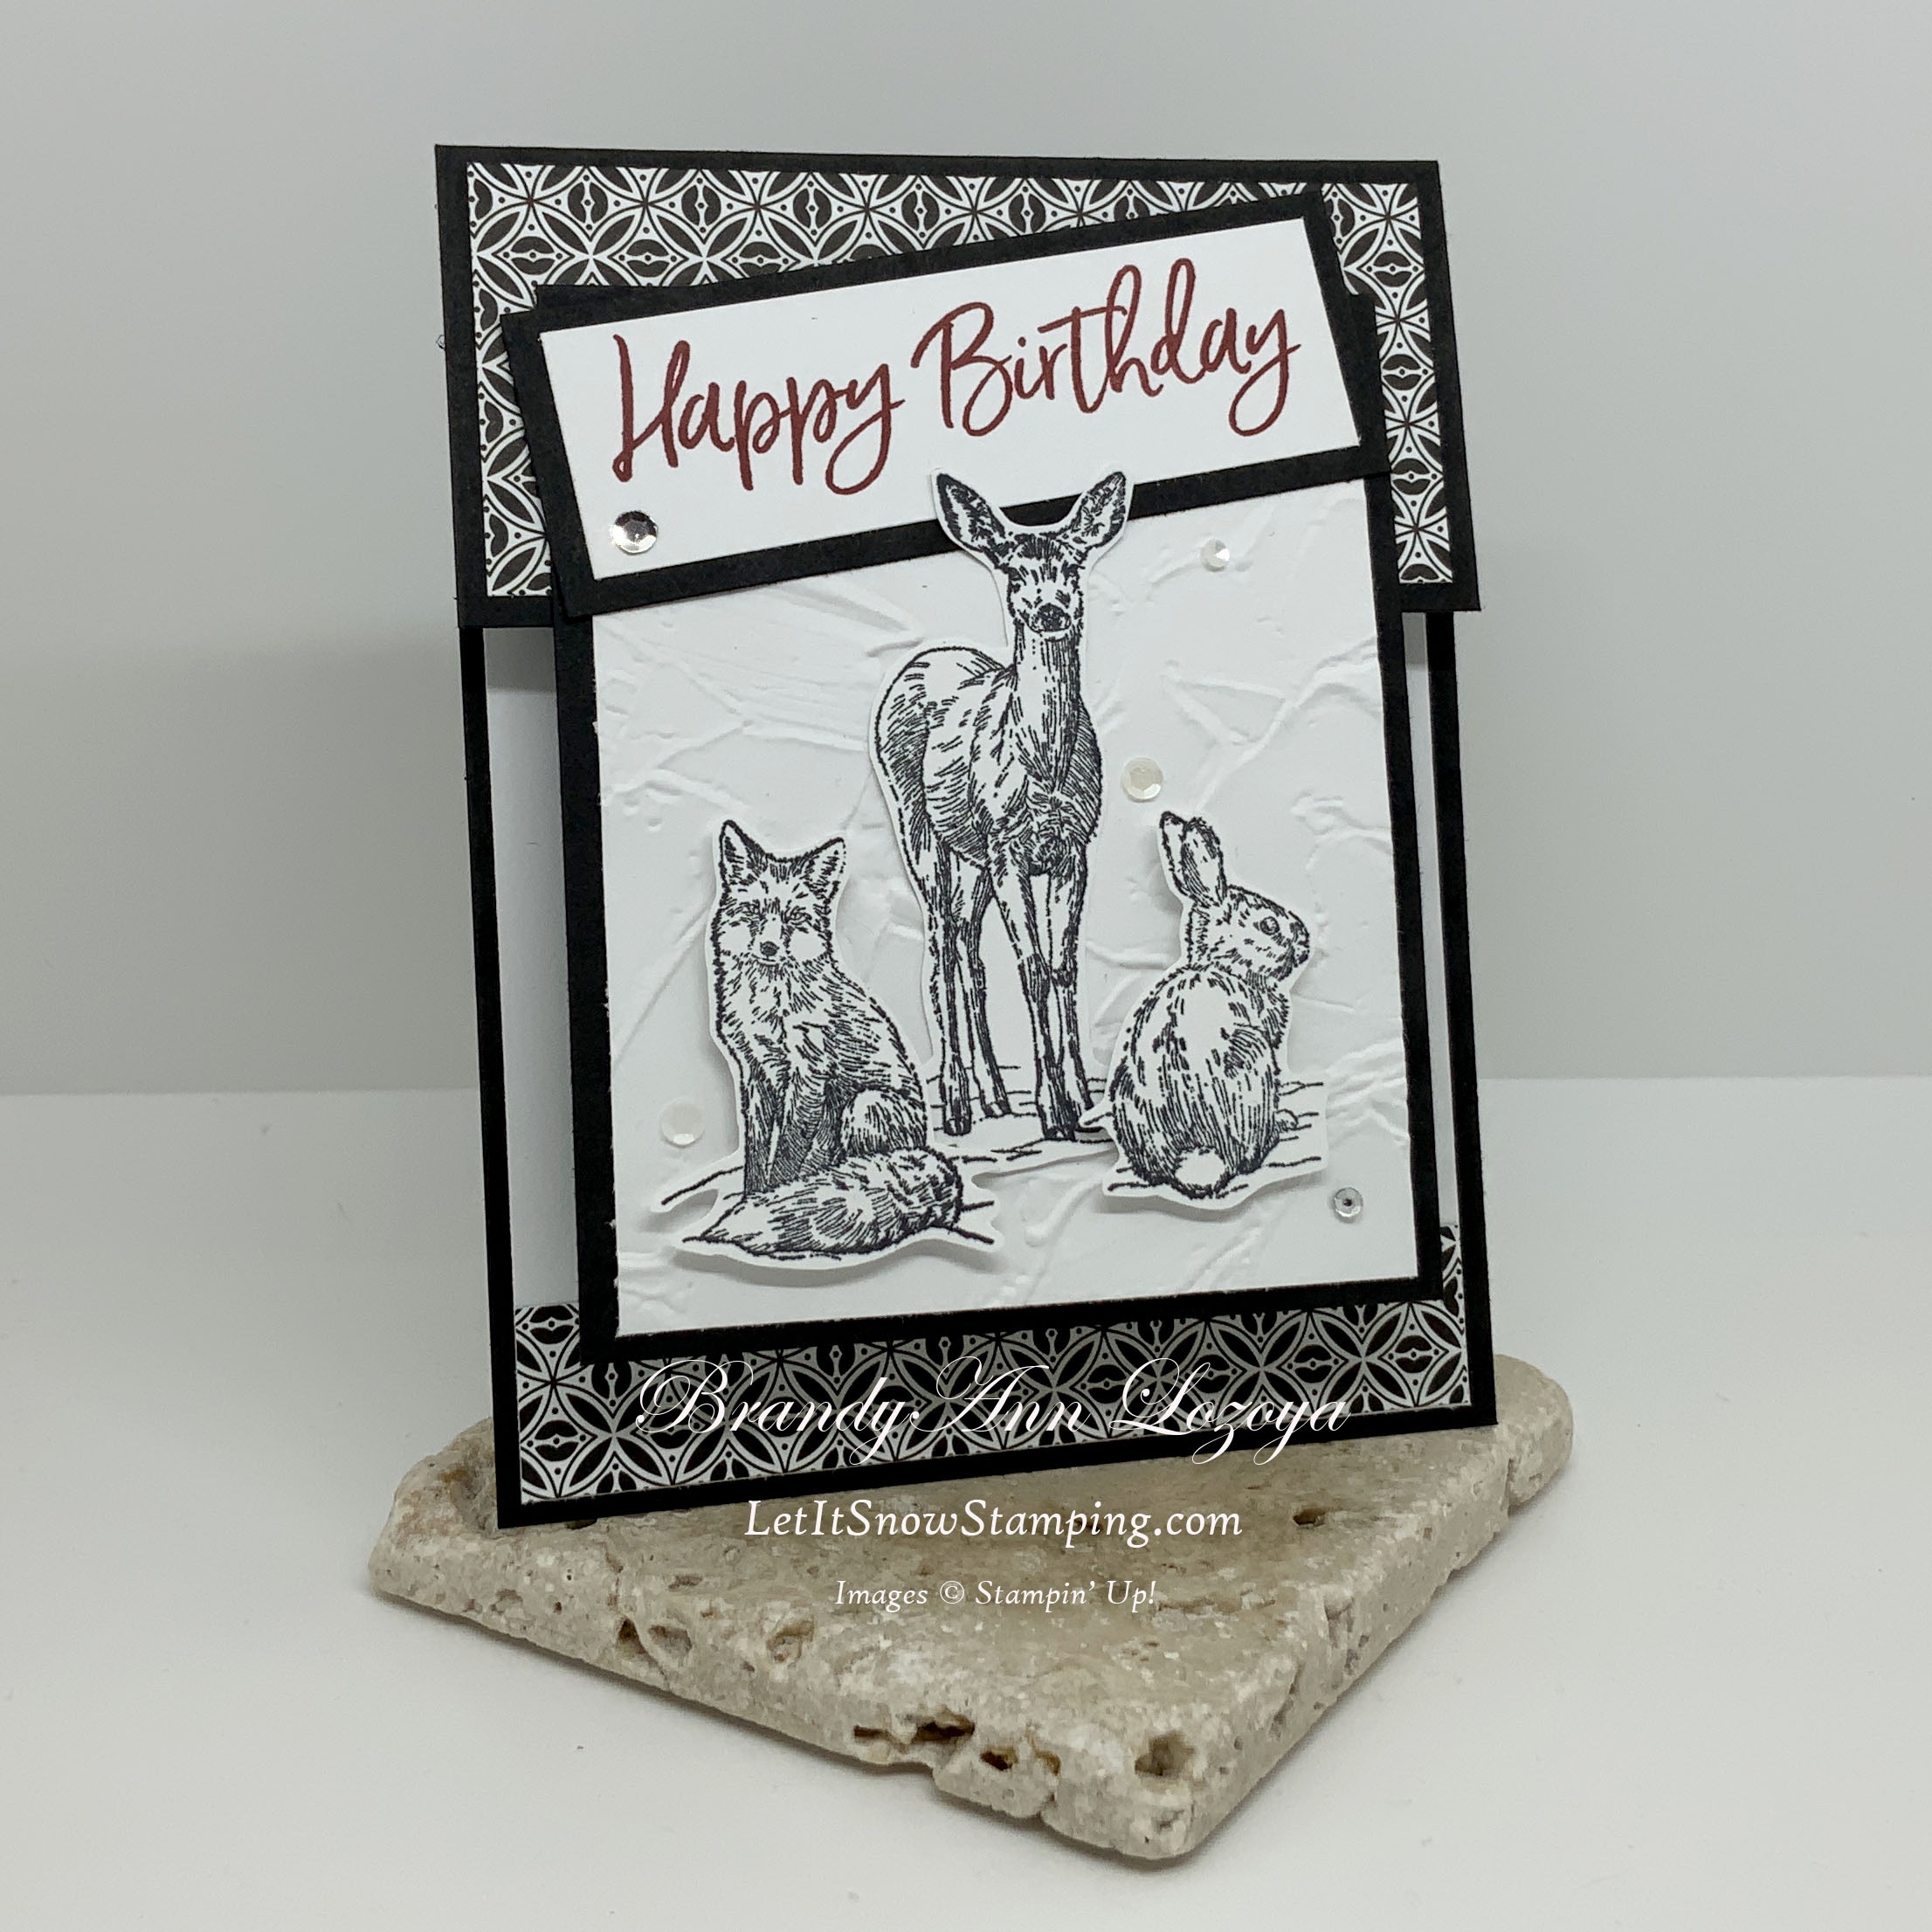
These little critters, while you’ll never see them in this pose in nature, they are just too adorable to showcase one at a time today. Today’s card features all three animals in the stamp set and a fun fold I learned at Stamp Camp this weekend from Lisa Lange.
Level – Casual (Intermediate)
Supply List
- Stamp Sets
- Nature’s Beauty set
- Sweet Ice Cream set – front sentiment
- Best Year set – inside sentiment
- Dies/Embossing Folders
- Painted Texture 3D Embossing Folder
- Cardstock/DSP
- Basic Black
- Card Base measures 4-1/4”x7-1/2”, scored and folded at 2″
- Large mat measures 3-1/2”x4-1/4”
- Sentiment mat measures3-1/2”x1-1/4”
- Pattern Party Designer Series Paper
- Large top piece measures 4”x1-3/4”
- Small inside panel piece measures 4’x3/4”
- Basic White
- Inside panel measures 4″x5-1/4″
- Front panel measures 3-1/4”x4” before embossing
- Sentiment measures 3-1/4”x1”
- Scraps for animals
- Basic Black
- Stamp Pads
- Tuxedo Black
- Cherry Cobbler
- Embellishments
- Subtle Shimmer Sequins
- Adhesive
- Stampin’ Seal
- Stampin’ Dimensionals
- Multipurpose Liquid Glue
- Tools
- Bone Folder
- Tweezers
- Paper Snip Scissors
- Take Your Pick Tool
- Clear (Acrylic) Blocks D & H
- Paper Trimmer
- Stamparatus
- Simply Scored Scoring Tool
- Stampin’ Cut & Emboss Machine
Instructions
Begin by scoring and folding your card base at 2″ and burnishing it with a bone folder for a nice, crisp fold.


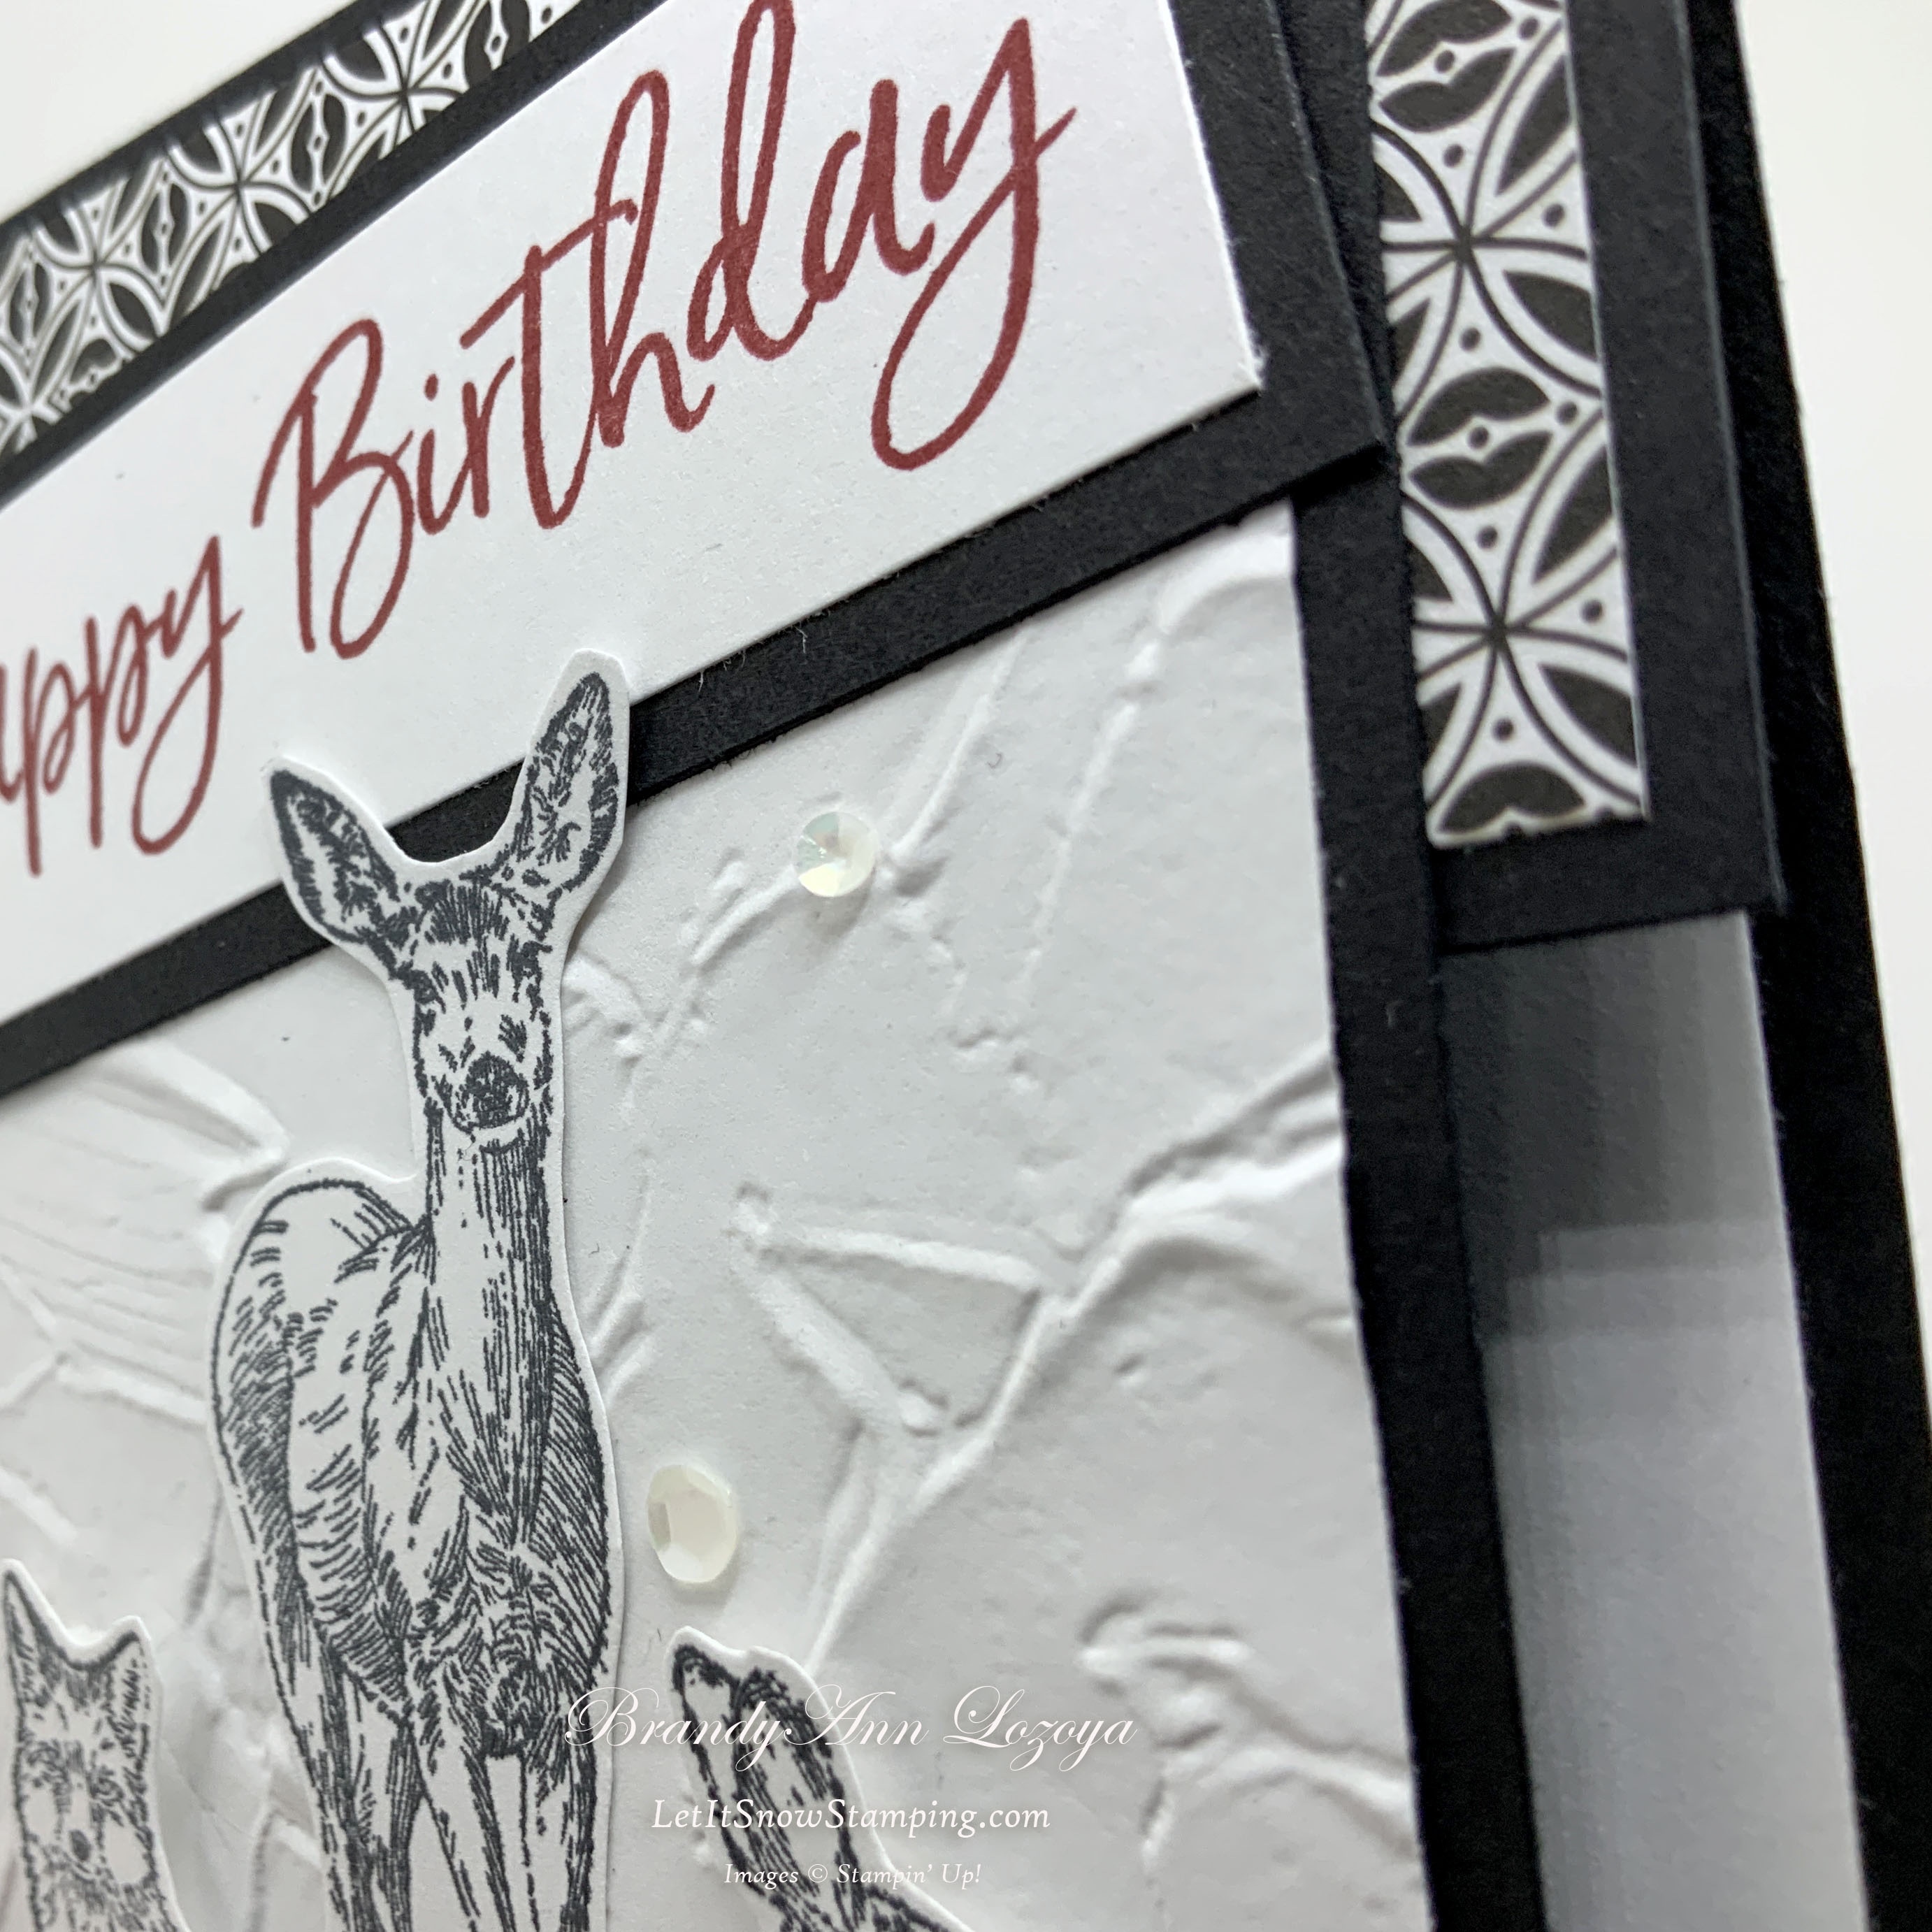
On the white inside panel, stamp sentiment in Cherry Cobbler ink and adhere to inside of card base.


Now, adhere DSP pieces to card. Smaller piece goes along the bottom of the inside panel. Larger piece goes along the top flap of card base.

Inside Panel 
Top Flap
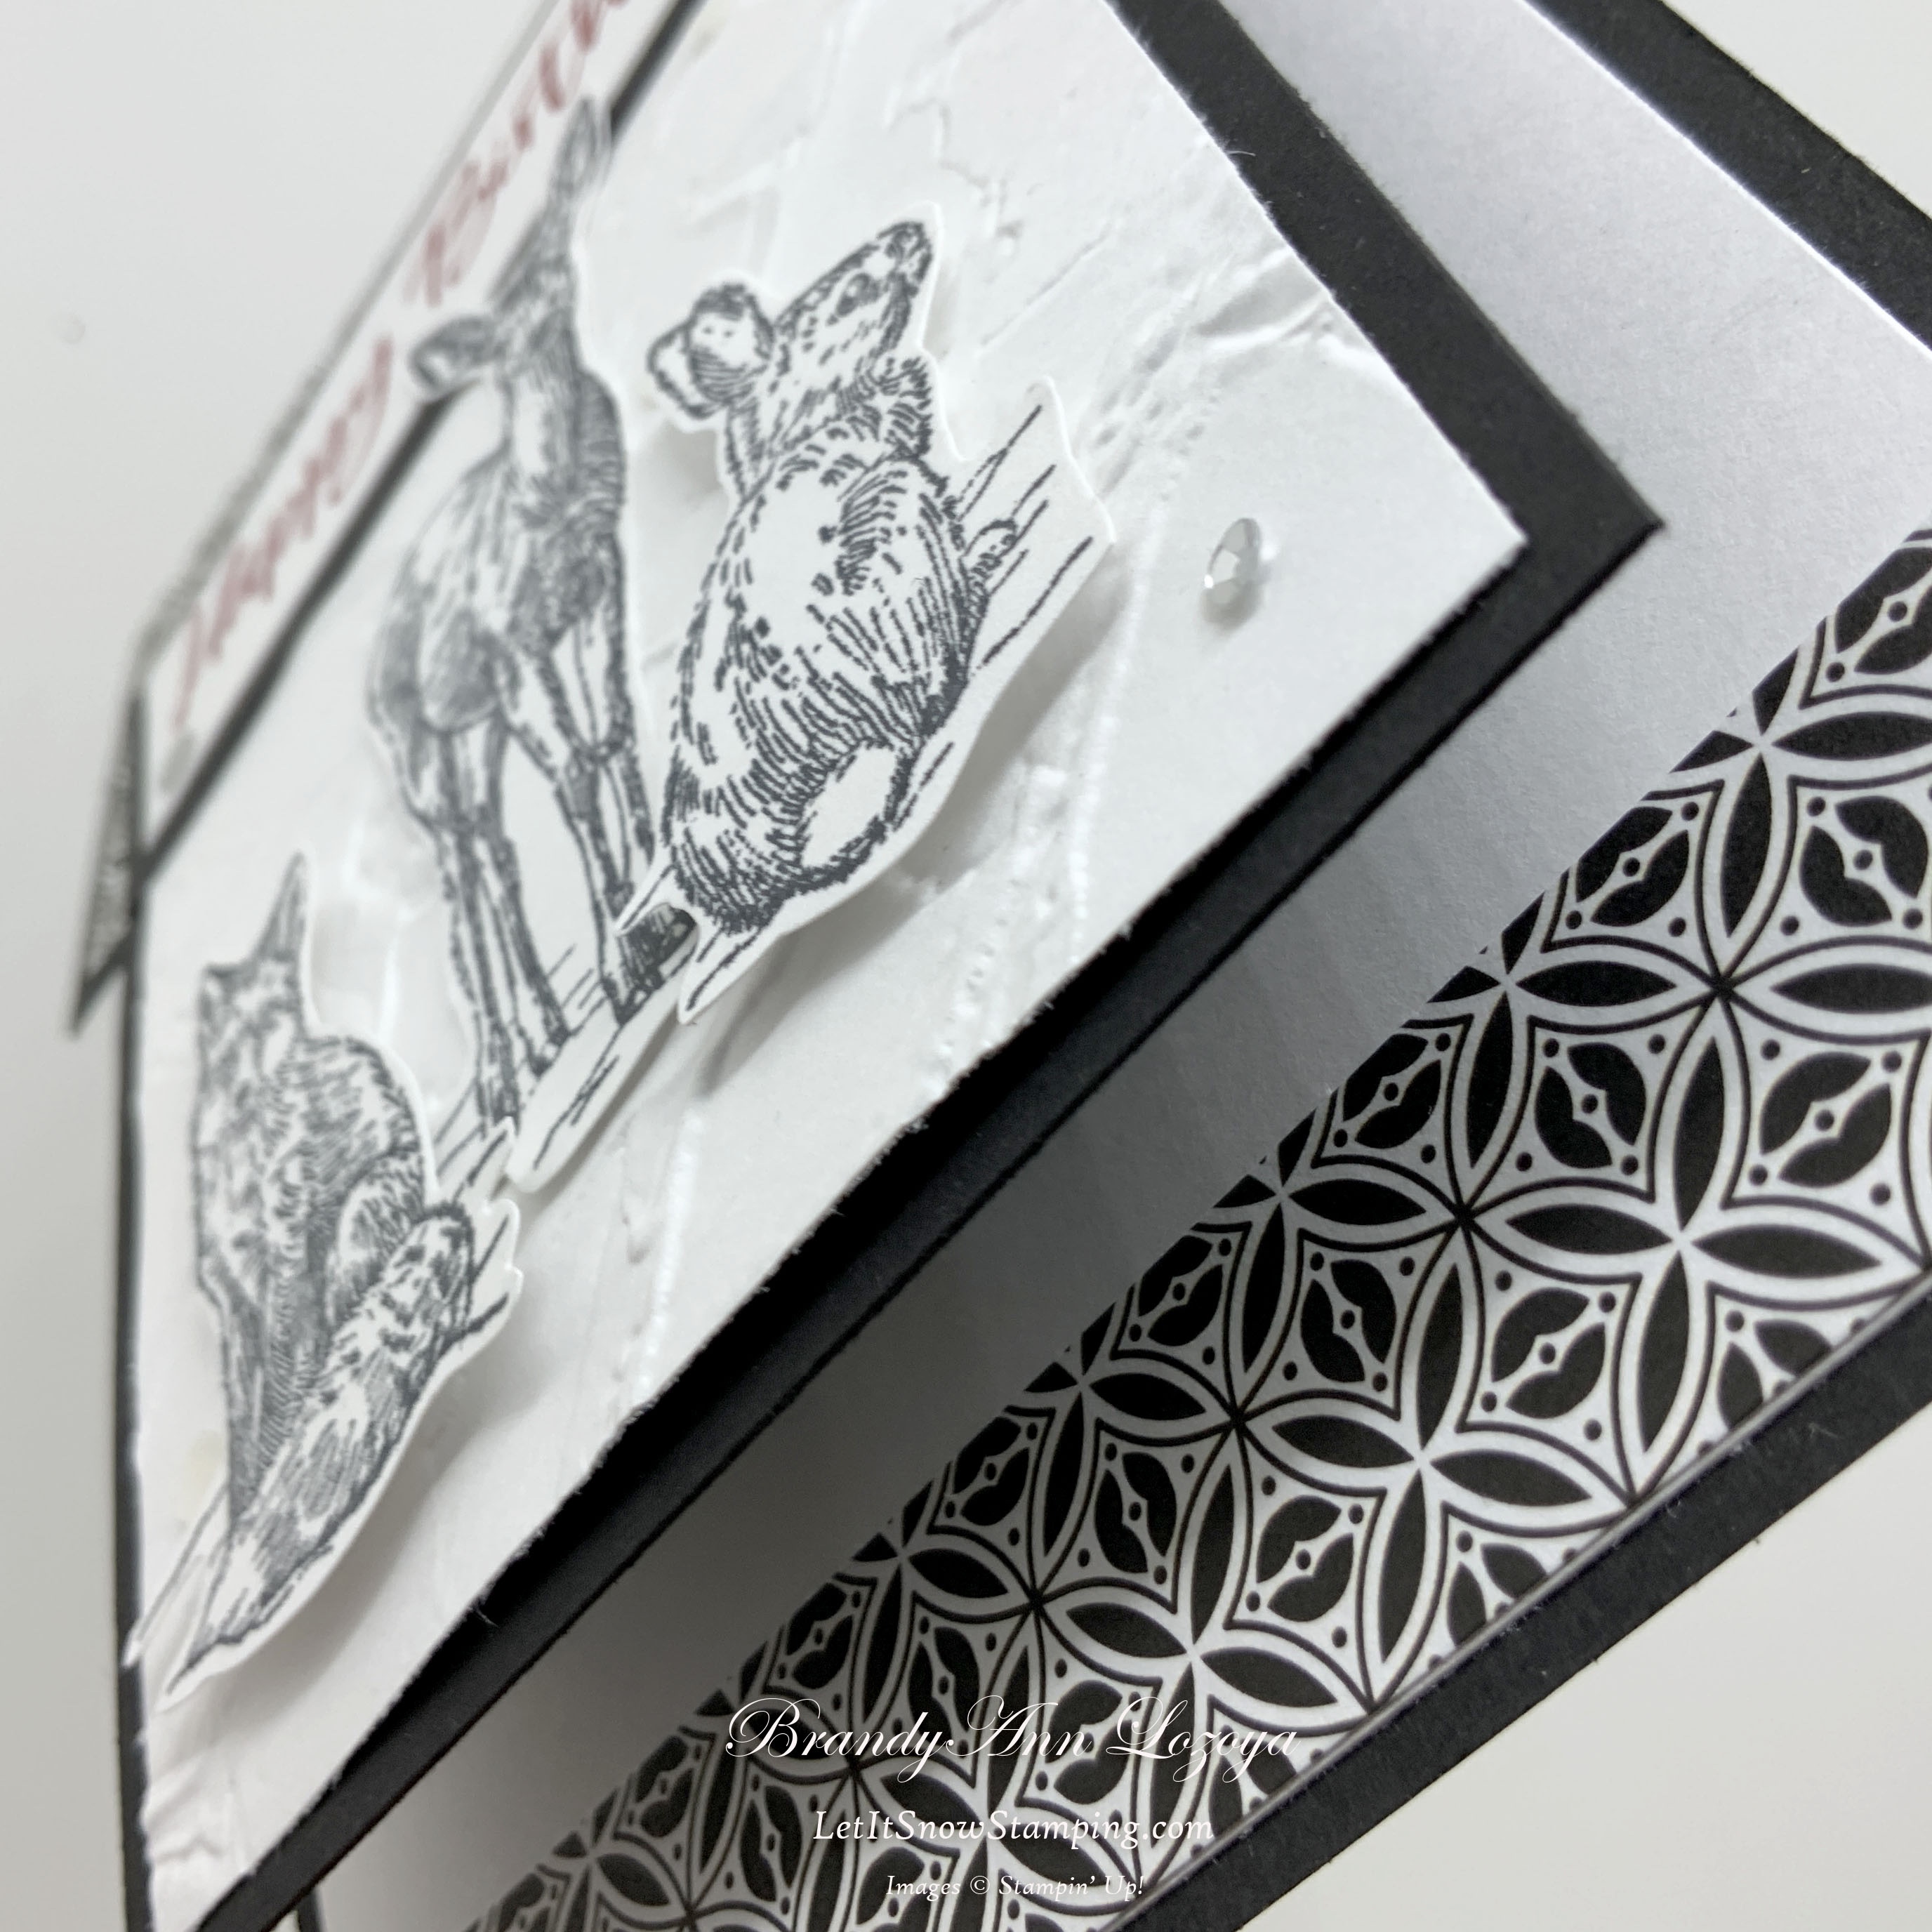
Emboss front panel with the Painted Textures embossing folder.


Adhere embossed panel to black large mat. Then, adhere to card front. Only add adhesive to top edge as shown. I was holding it upside down in the picture, sorry!


Because the images are delicate, I use my Stamparatus to stamp the images. This helps if they don’t stamp completely the first time, as my rabbit did. I was able to stamp again without creating a shadow image. If you would like a lesson on the Stamparatus, go to the video library and click on How To.

Fussy cut animals (cut out with snip scissors).

Adhere deer with regular adhesive and then adhere the fox and rabbit using dimensionals. Use every available piece of foam adhesive on your dimensionals sheet!


Stamp sentiment in Cherry Cobble and mat.


Adhere sentiment to card front. I tucked it behind the deer’s ears.

Adhere sequins.

The Final Project


When ordering use my name and the October 2021 host code for extra benefits
BrandyAnn Lozoya
DKGKTMQ2
I hope you enjoyed today’s project. Make sure to subscribe to Let It Snow Stamping so you never miss another blog post. Every week I pick a stamp set and make one project every weekday. As an added bonus I also make videos for new techniques. The techniques can also be found under the Technique Corner tab.
Make sure you find LISS on:
Facebook (#LISStamping, @LetItSnowStamping),
Instagram (@LetItSnowStamping),
